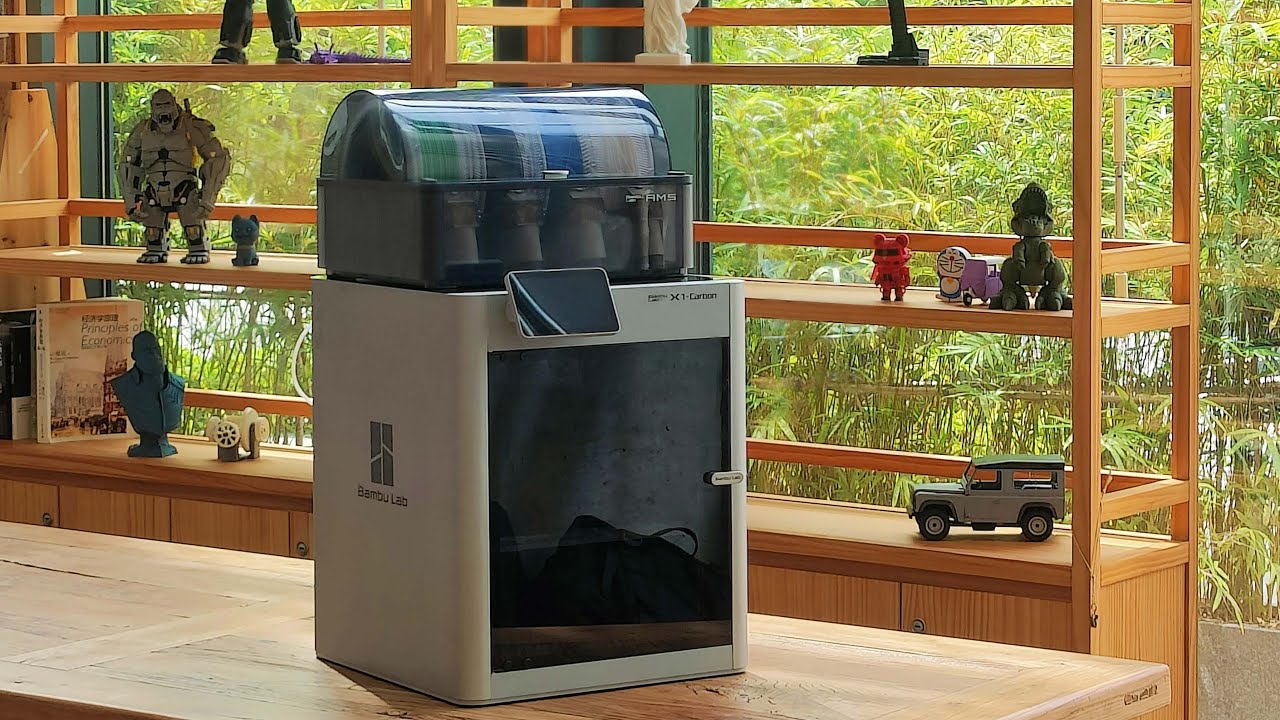
Lately, there has been a lot of fuzz in the 3D printing community and Facebook groups. Everyone is talking about a new company that has revolutionized 3D printers. Of course, everyone is talking about Bambu Lab. We managed to secure the Bambu Lab X1 Carbon Combo, its most advanced model, and present it to you.
Maybe my article seems exaggerated to some, but it is going to be only the truth. This year, I got really excited about two tech products. The first is the X1CC, and the second is something completely different that I will write about in the next few days.
As I mentioned, Bambu Lab is a new company that started as a project on Kickstarter, and we can easily say that people loved it. It managed to raise around €6,422,000 after the presentation of Bambu Lab X1 and its vision around it.
Unboxing
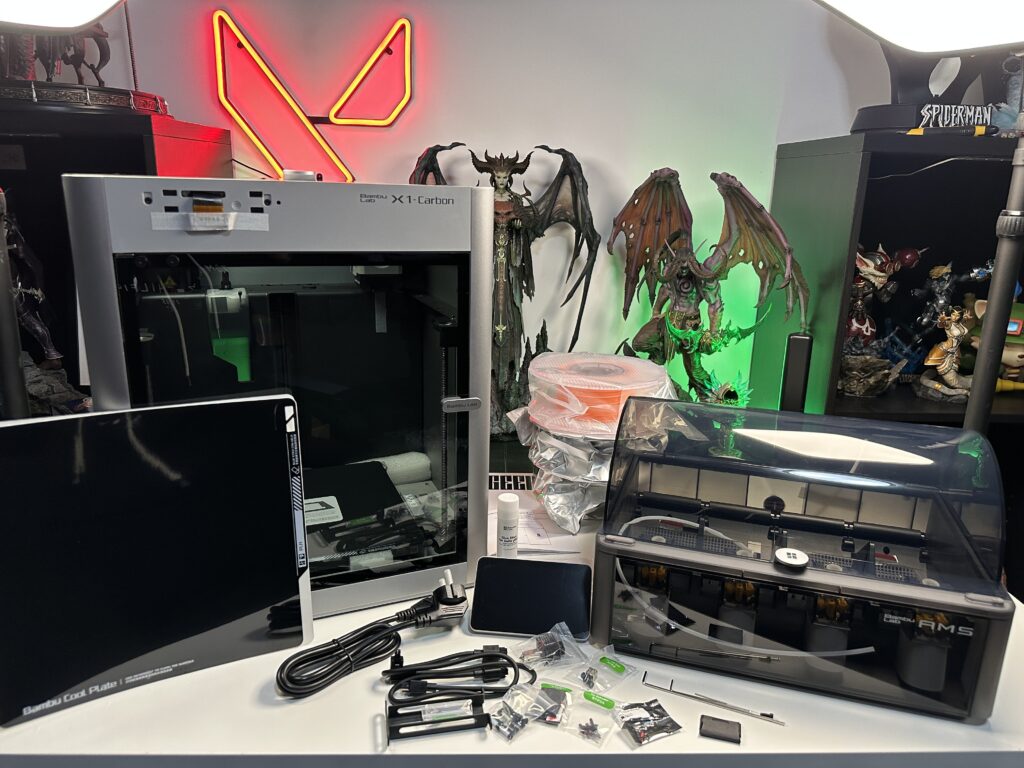
The printer comes in a large cardboard box. There is protective foam on the sides to keep the printer in place. Even though the box came with a big hole (the courier’s fault), the printer is well-packed and didn’t even have a scratch.
It may weigh close to 20kg and comes in one piece, but it’s very easy to get it out of its box by simply pulling the plastic wrap from its edges. I won’t hide that as difficult as unboxing the printer was due to its size and weight, I was just as excited to see what was inside. What I found inside the box was:
- The Bambu Lab X1 Carbon
- One Bambu Lab AMS
- One flexible magnetic steel Build Plate
- Two extra Cold Build Plate print stickers
- 3x Bambu filaments (PLA orange, PLA white specifically for supports and one PA-Carbon fibre)
- Accessory Box
- One touchscreen 5″, 1280×720
- One spool holder
- One spare hot end
- Two nozzle wiping pads
- Two spare filament cutters
- A power cord
- A 6pin cable
- A razor (to peel the models off the bed)
- A 4pin cable
- Two Allen keys, one H1.5 and one H2
- A needle to clean the printer’s nose in case it gets clogged
- A glue stick for the base of the print.
- And of course, the manuals
While it could have some more accessories in the box, Bambu Lab chose to pre-install the print files for these pieces inside the printer. If, for example, you need a handle for the model removal razor, then you will need to print it yourself. All you get in the box is the razor itself.
No, they are not skimping on the accessories, they are just trying to reduce the use of plastic in this way. If the filament runs out, the spool can be reused. For this reason, when buying filament, Bambu Lab gives you the option to choose either a whole roll or just a refill. In case you don’t have the spool, you can print it since the printer is also included in the pre-installed models.
Before you start printing
The Bambu Lab X1 Carbon Combo requires no assembly as it comes assembled directly from Bambu Lab. But it is not plug-and-play. You’ll need to follow some simple steps before you can start printing.
Setting up the printer
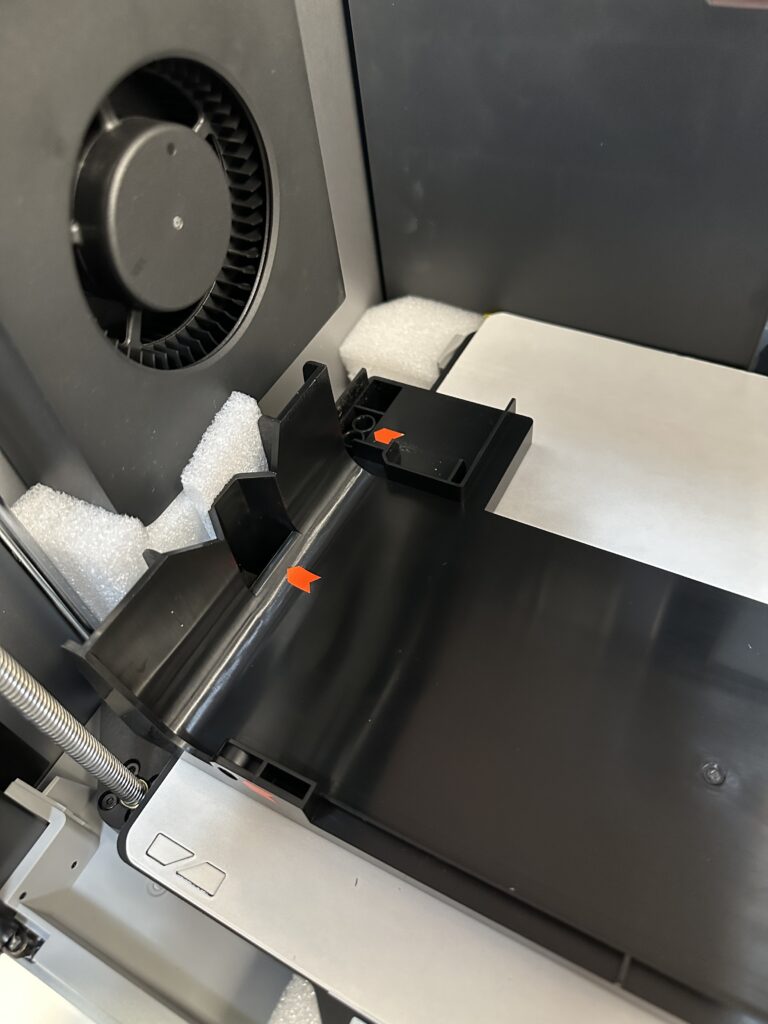
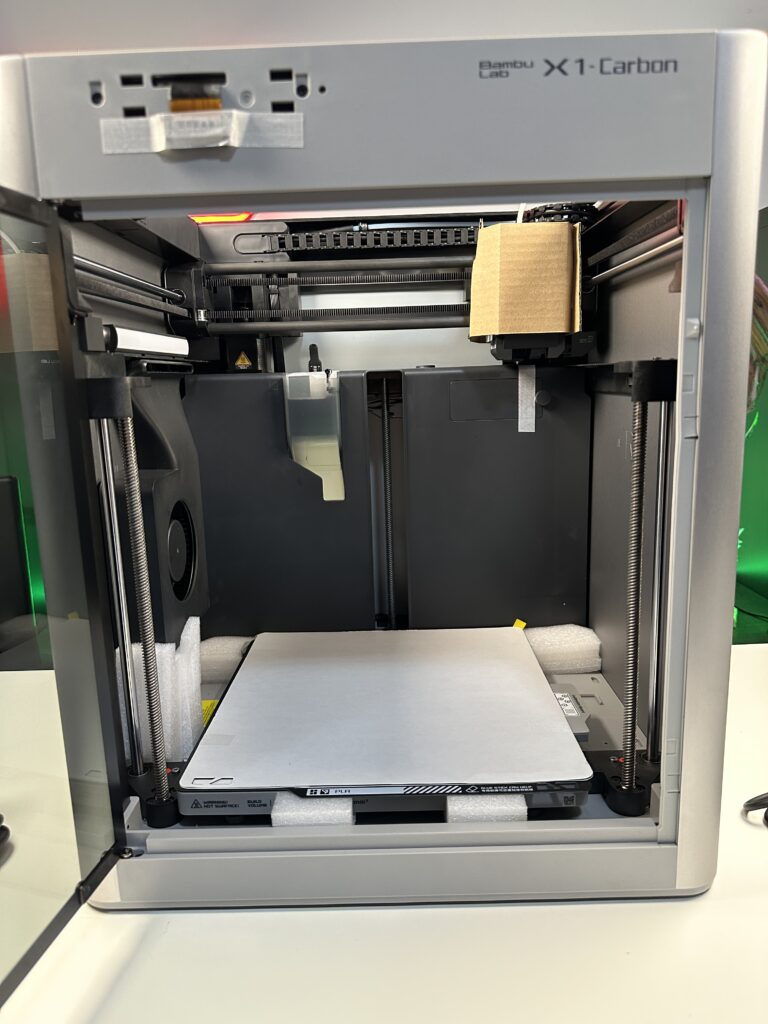
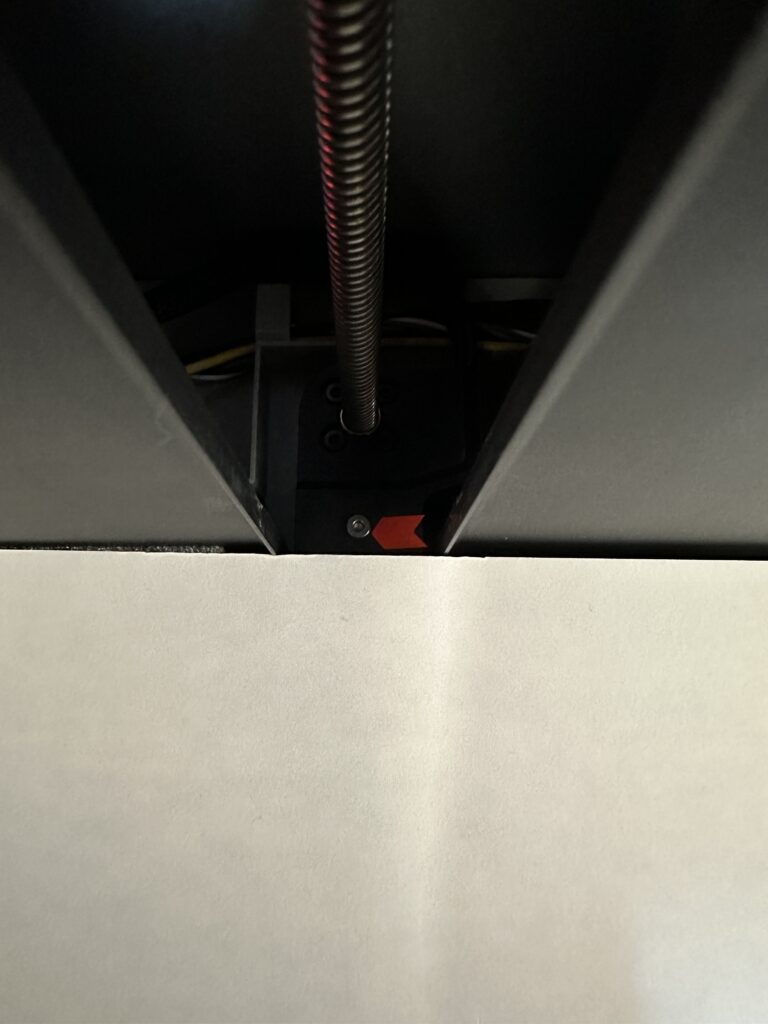
As soon as you take the printer out of its box, and open the glass door, you will see that its interior is not empty. Instead, there is something big that doesn’t come out if you just pull it. Yes, I tried that before reading the manual. After reading the manual, I saw that on the front there are two red arrows and right next to them, two screws. Unscrewing these screws frees the device and you can pull it off the top of the printer.
What is this device? It is Bambu Lab AMS (Automatic Material System). One of the smartest inventions in the field of 3D printing. It offers you the possibility to put up to 4 different types and colours of filament. If the filament is from Bambu Lab, it comes with a chip that enables AMS to “read” the filament and automatically import its settings into your printer. Magic!
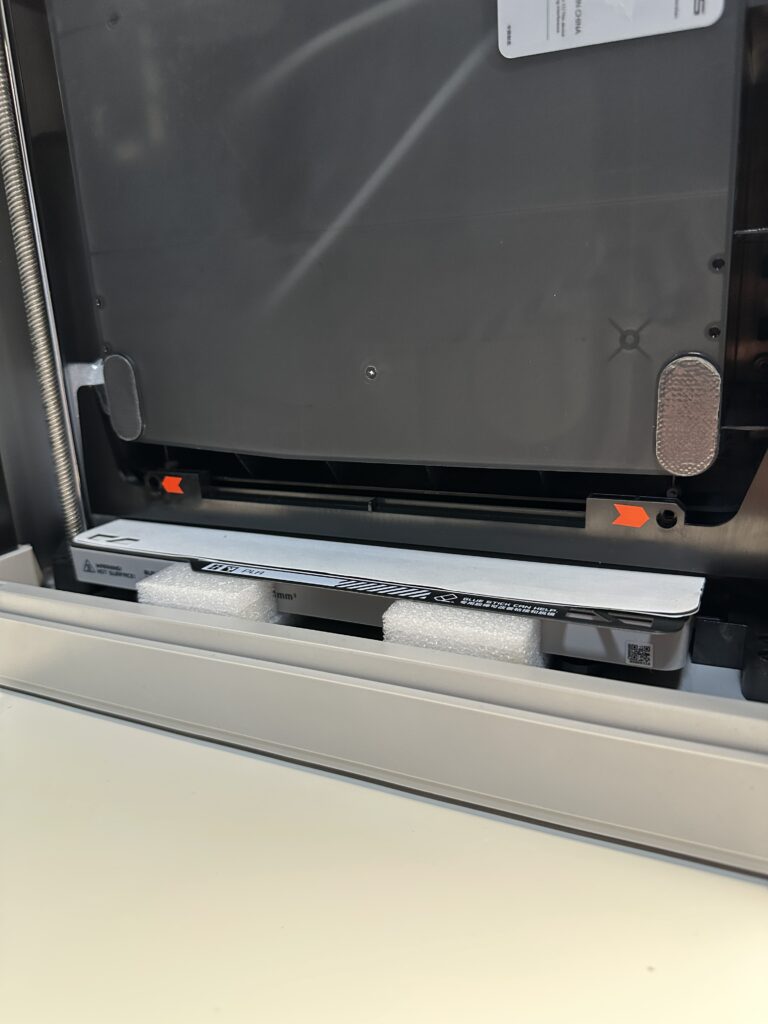
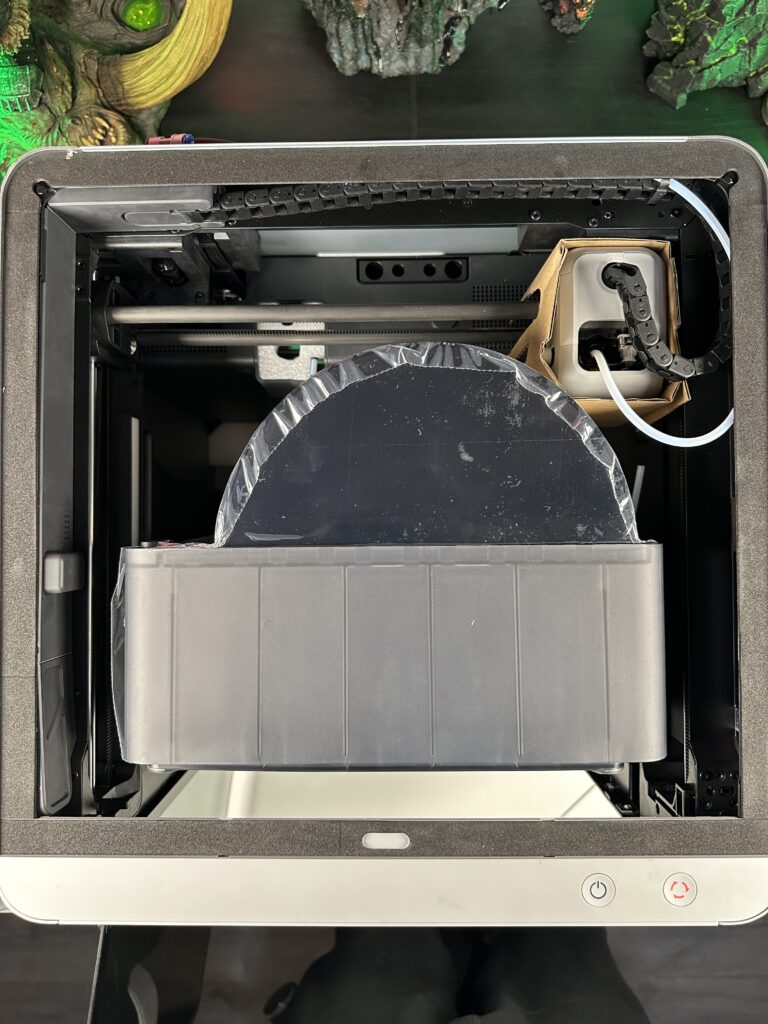
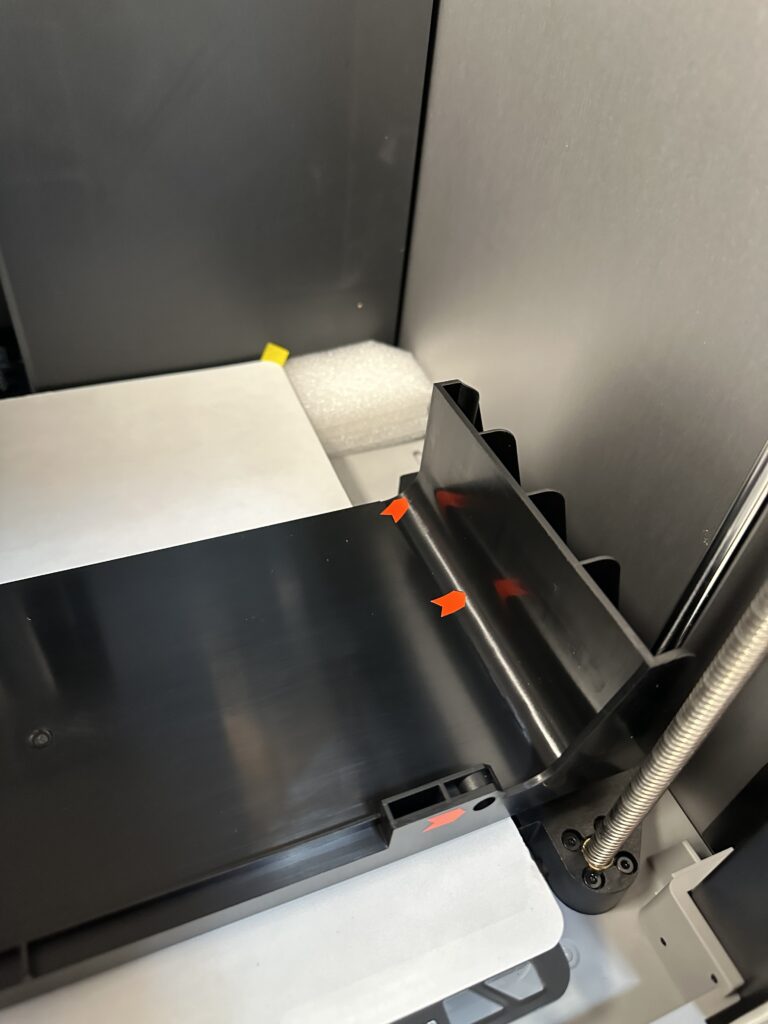
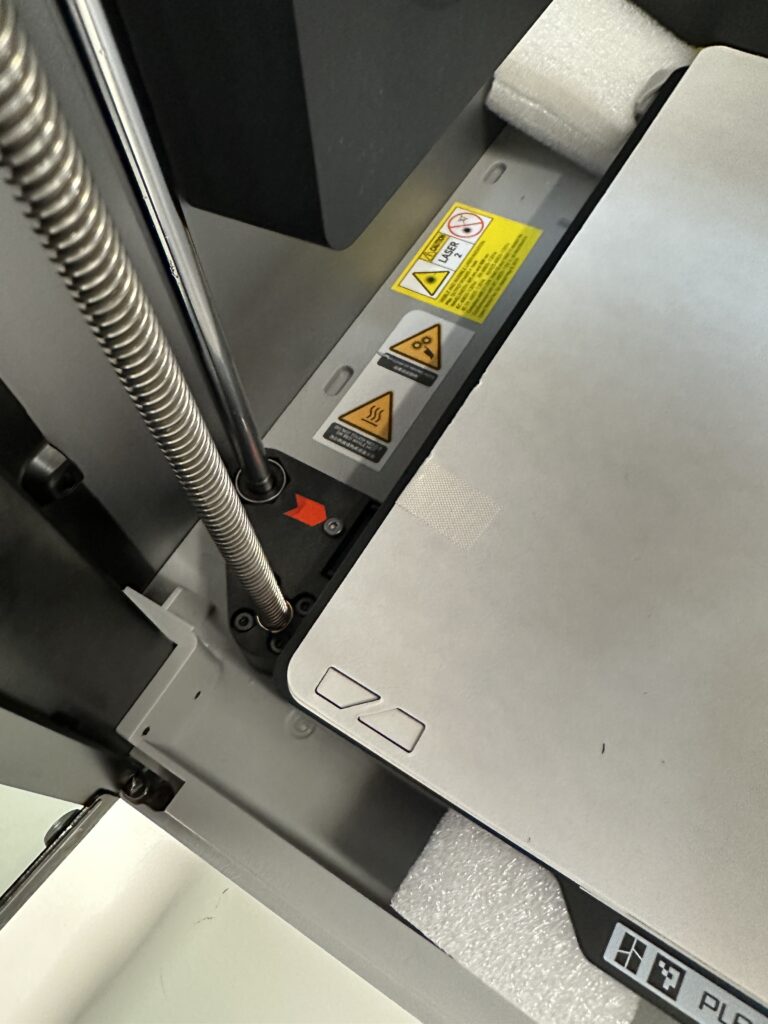
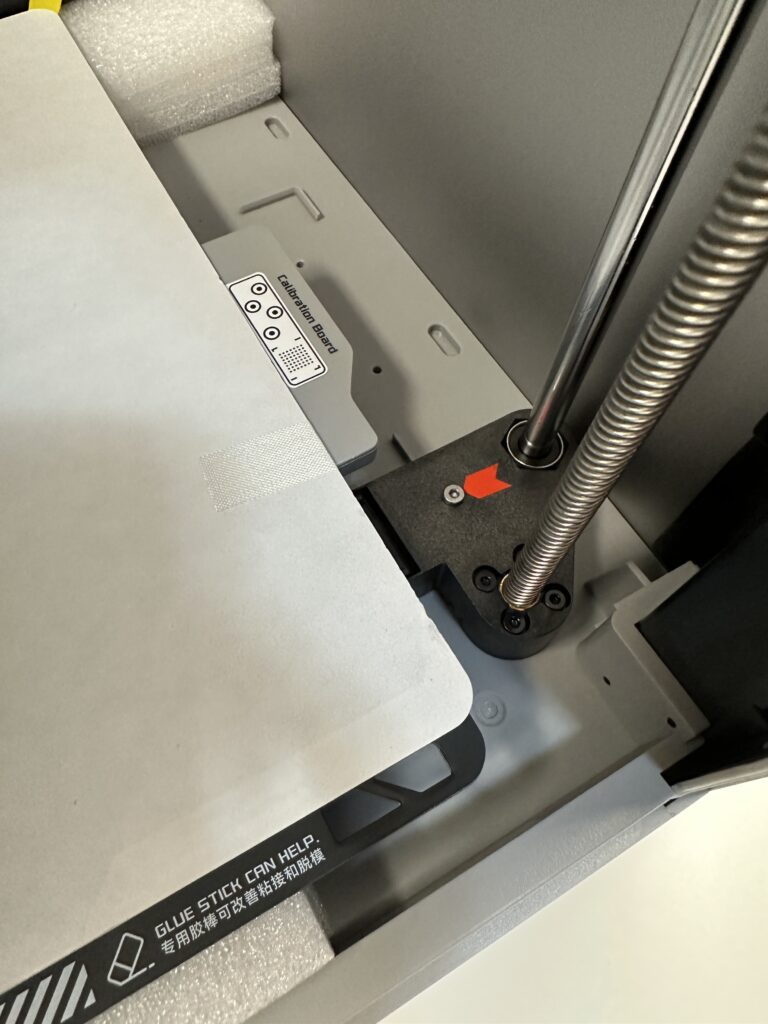
As soon as you remove the AMS from inside the printer, some new arrows are visible. Therefore, you follow the same process as above. You unscrew all the screws to free the printing bed. Be careful not to miss a screw because you are most likely to damage the mechanism that raises and lowers the bed.
In the photos below, you see that there are two screws on the left and two on the right and the AMS mount comes out. Then you have one more screw on the left, one on the right and one hidden at the back in the centre. That’s it. No more screws.
A small note here. Do not try to pull the protective foam under the bed. It won’t come out. You will be able to remove it when you turn the printer on for the first time and the bed will raise.
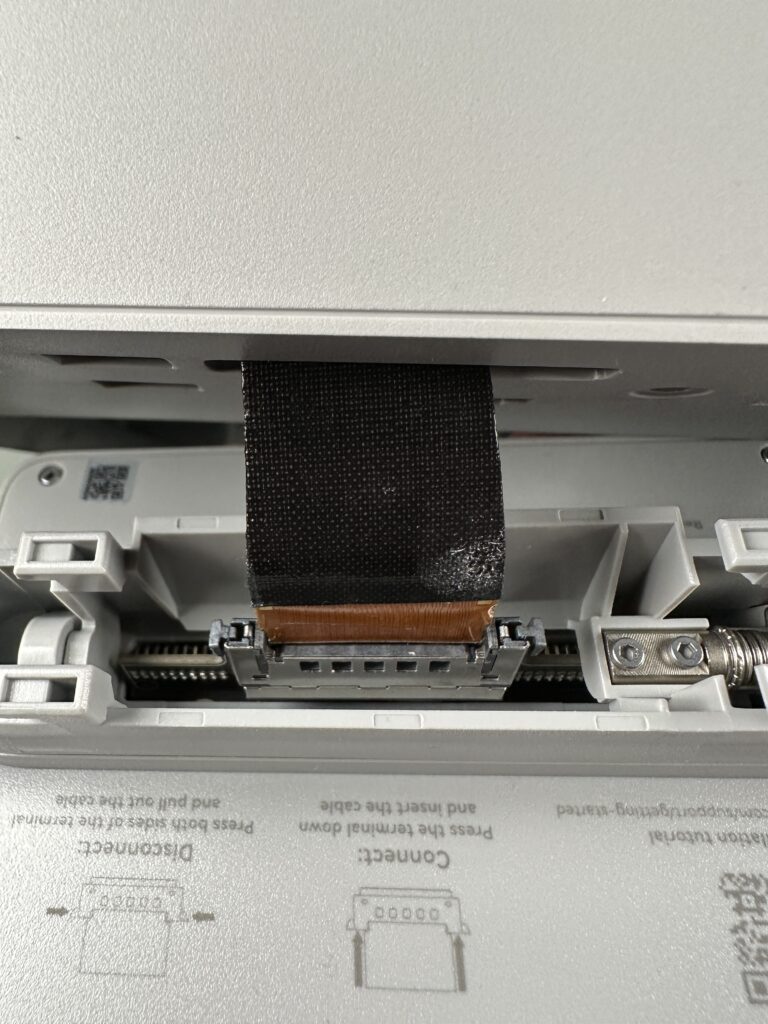
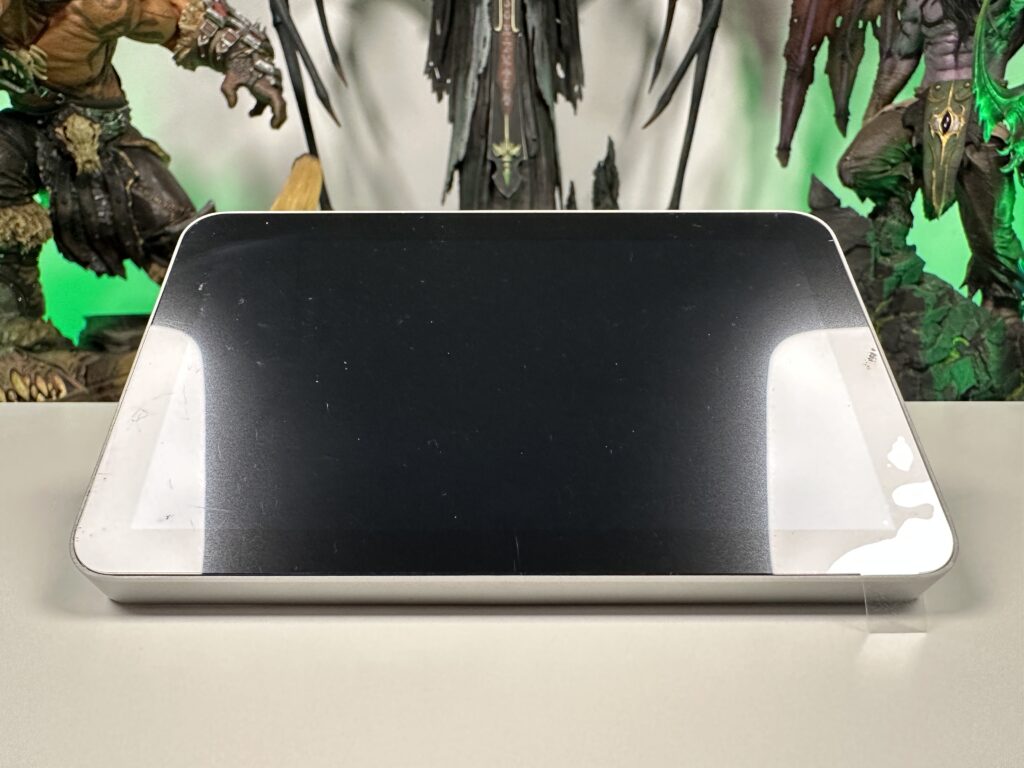
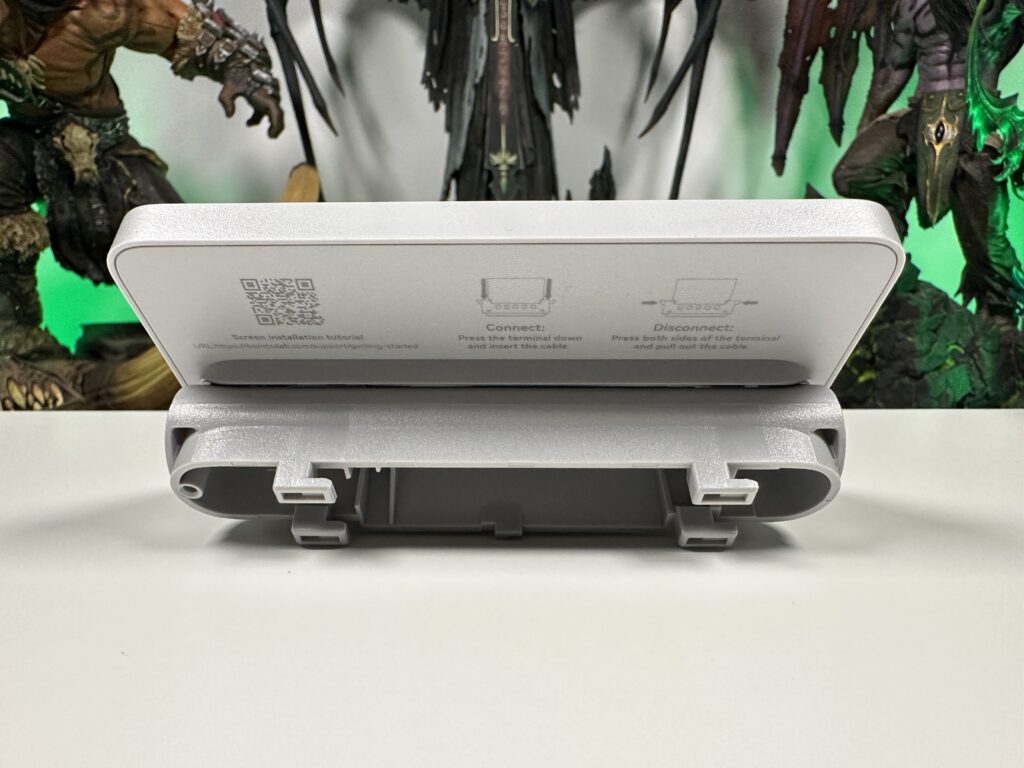
The next step is to connect the touch screen. A very easy process. You hold the screen so that the port for the SD Card is on the right side of the screen (as you look at it) and just clip the cable to the back of it.

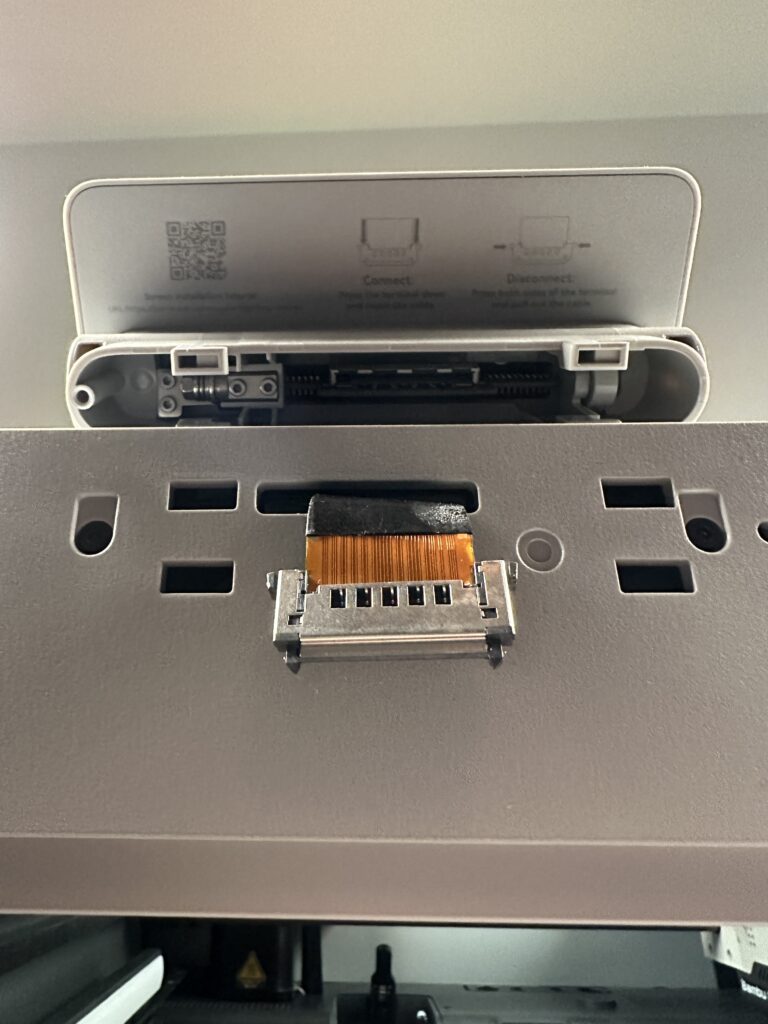
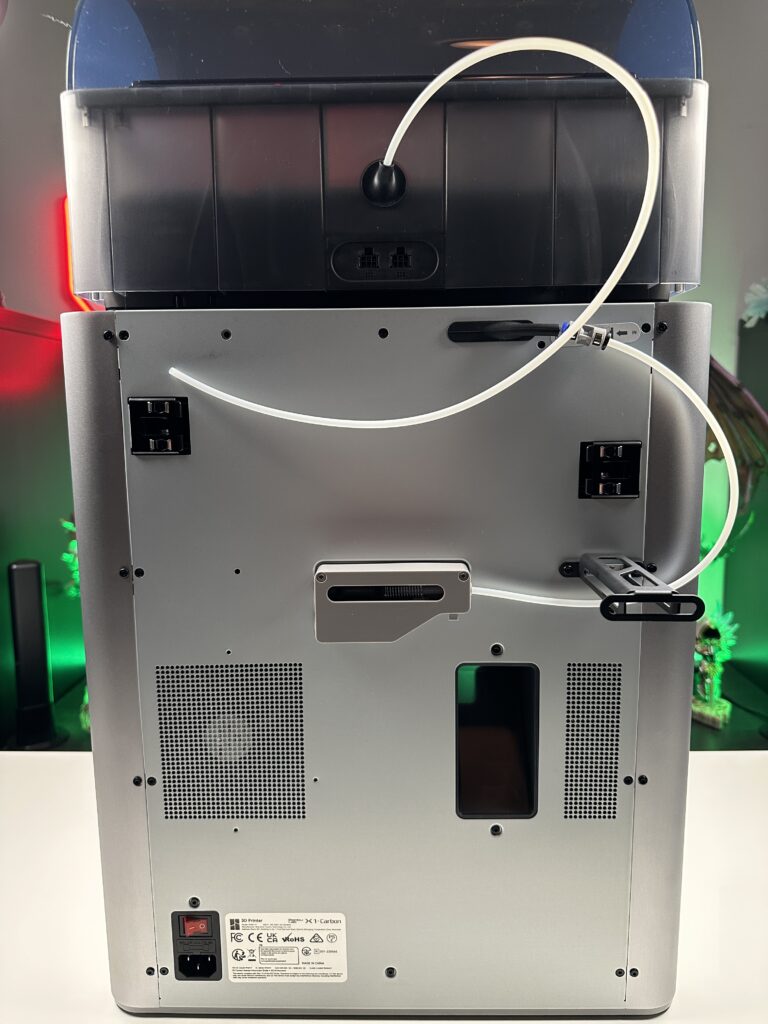
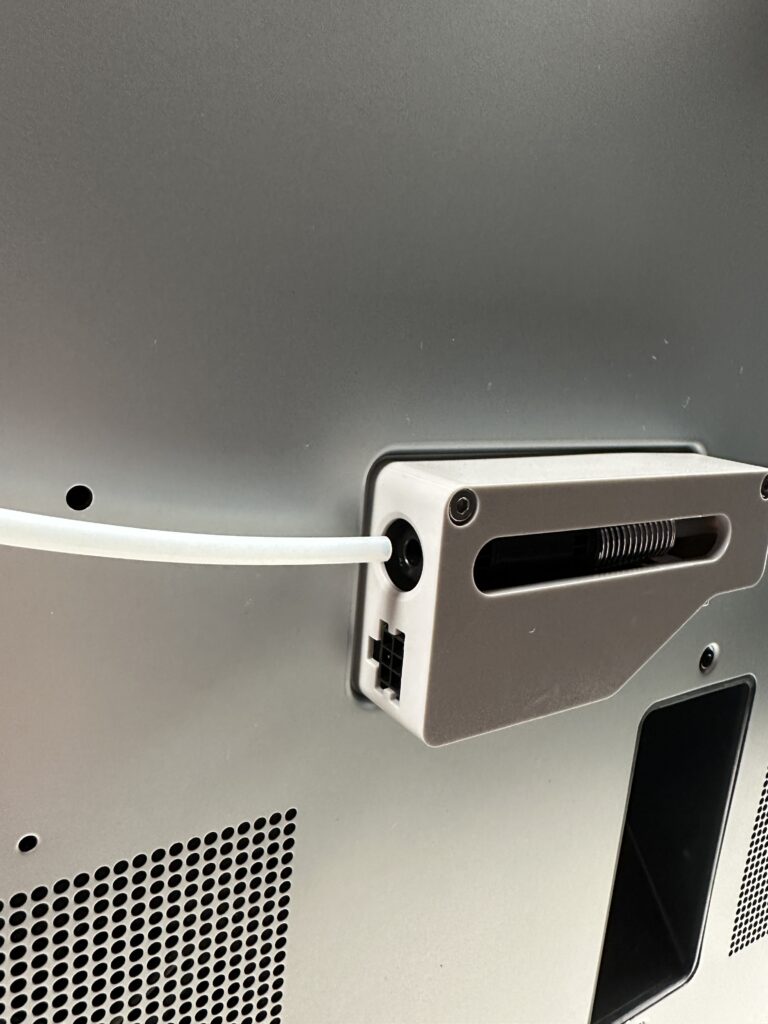
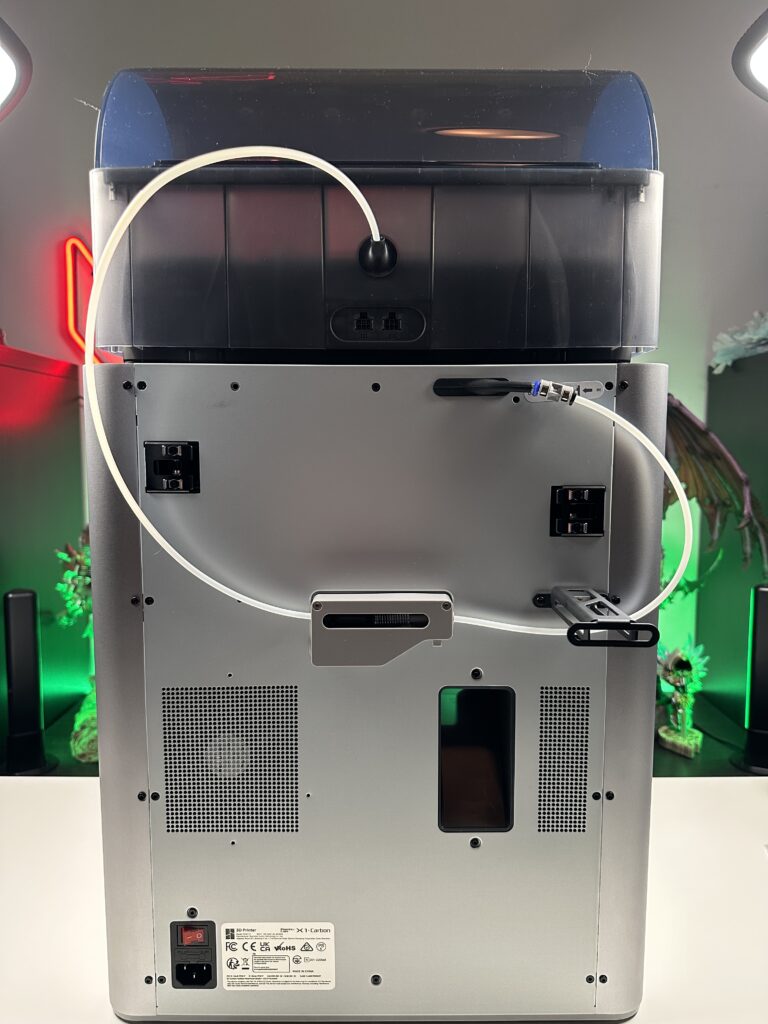
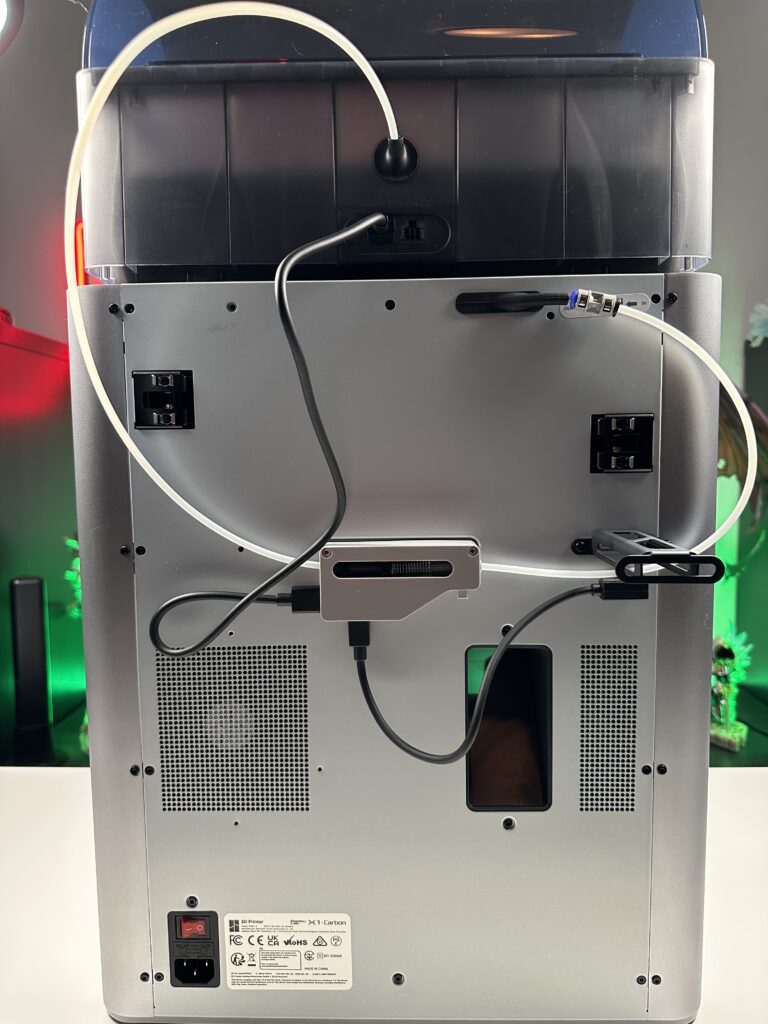
You are done with the front of the printer. Let’s move on to the back. What you should do here is based on the version of X1 you have. Are the steps different for the version with AMS and different without it? I will show you both cases.
X1 without the AMS
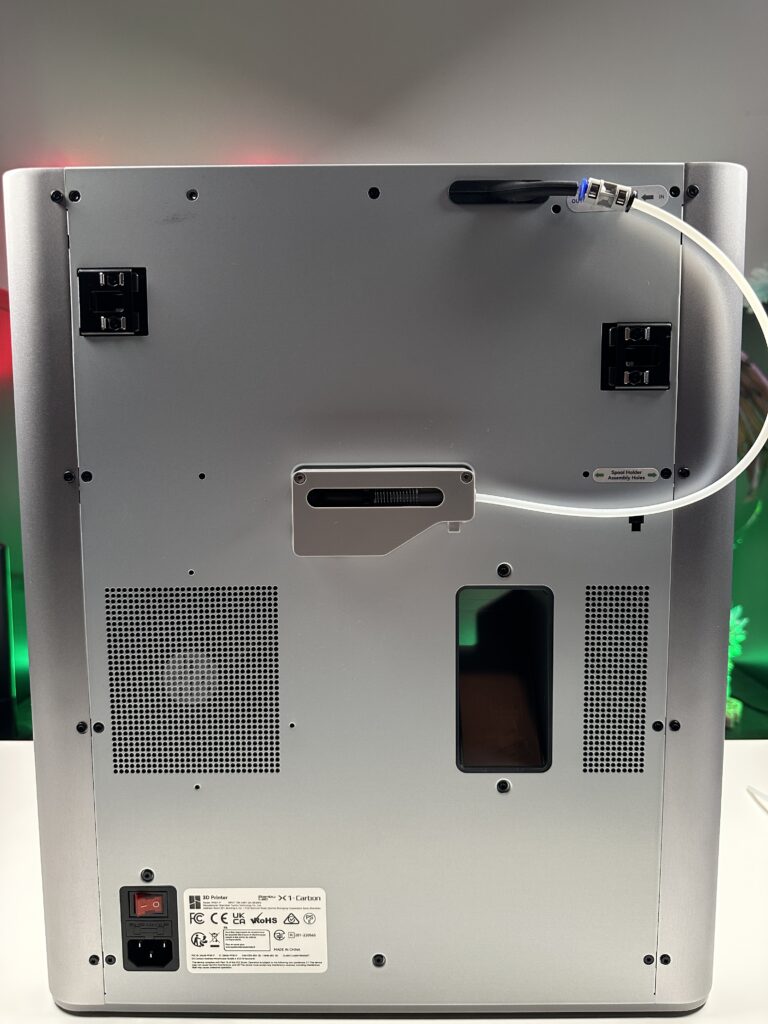
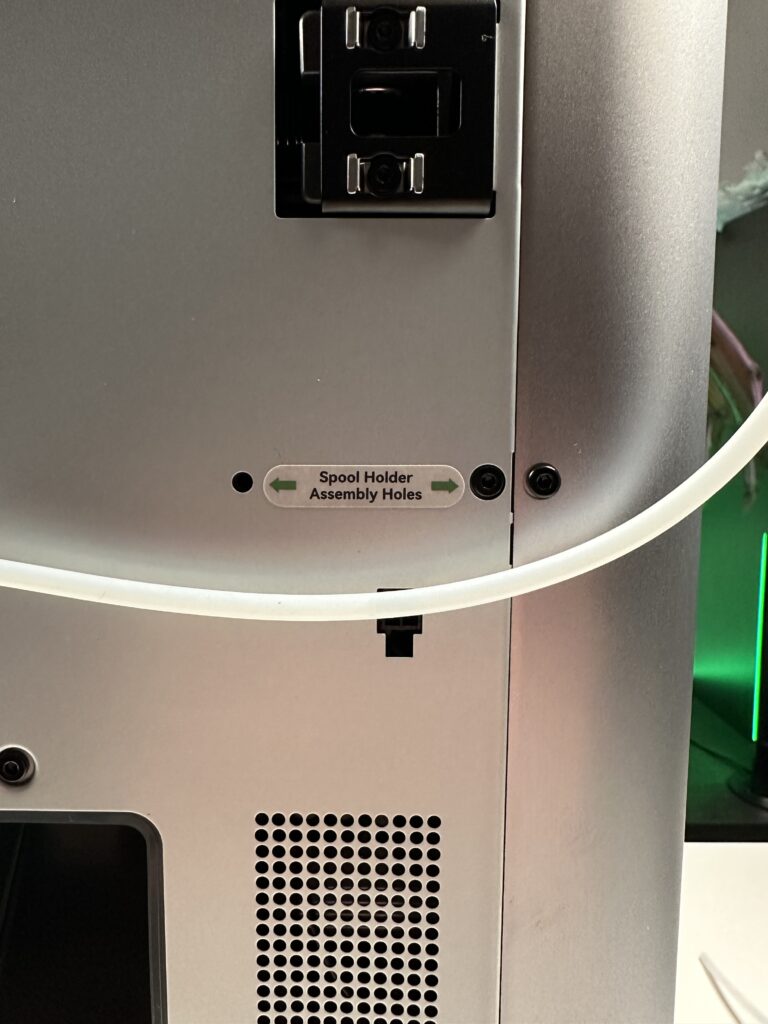
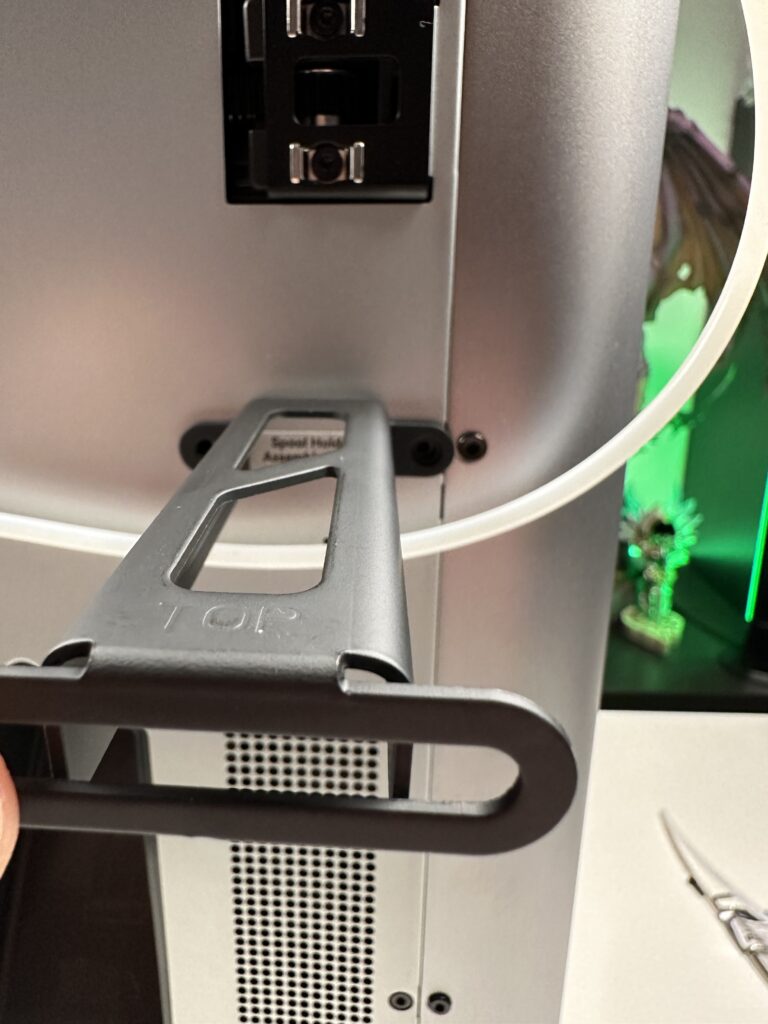
In case your X1 does not have AMS, then you will need to install the PLA spool mount on the back right side of the printer. There is a sticker that says “Spool Holder Assembly Holes” to make it even easier. Thank you Bambu Lab. In order for the mount to screw in there, you’ll need to first unscrew the right short screw and replace it with one of the long screws that comes with the mount.
X1 with AMS
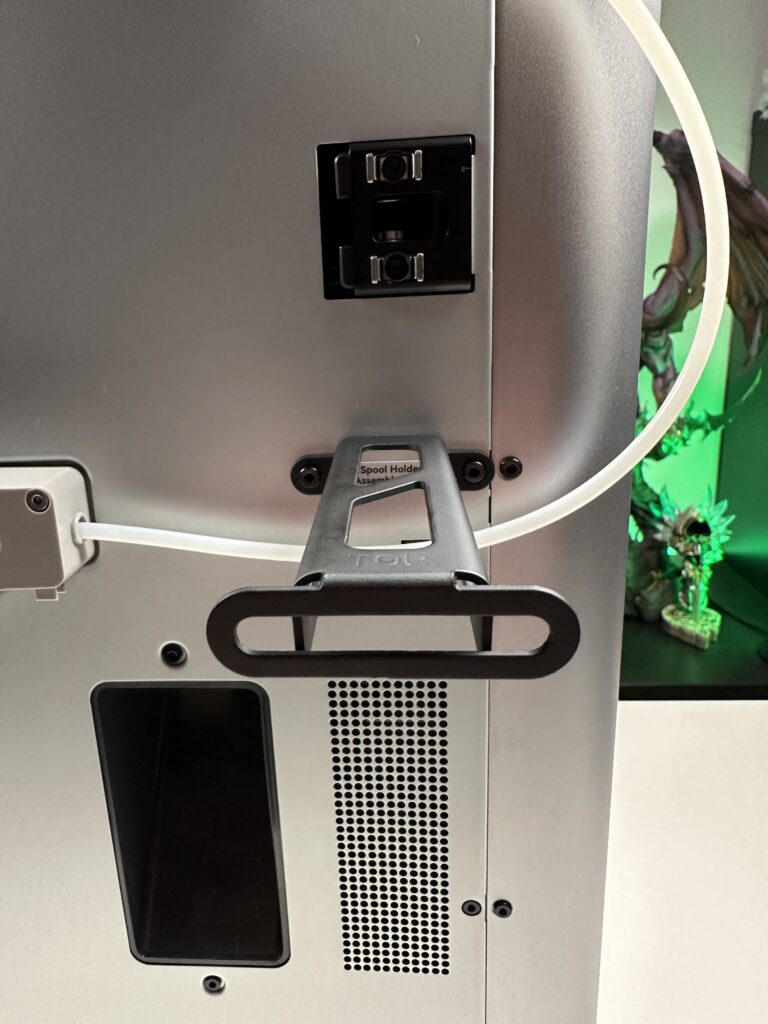
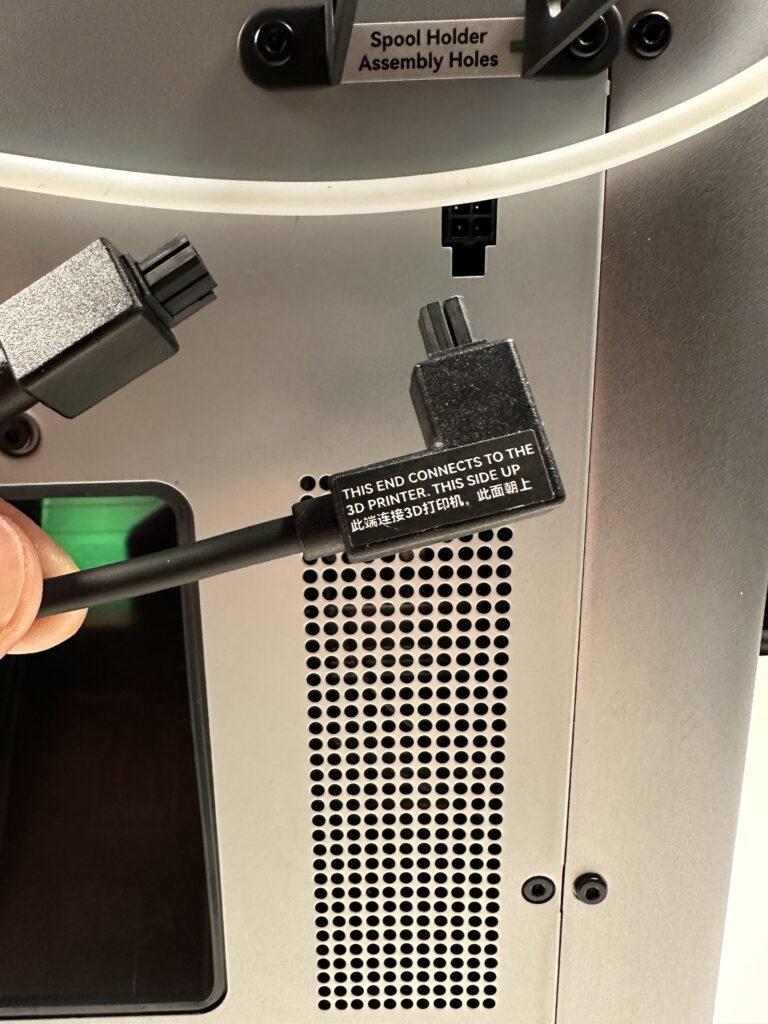
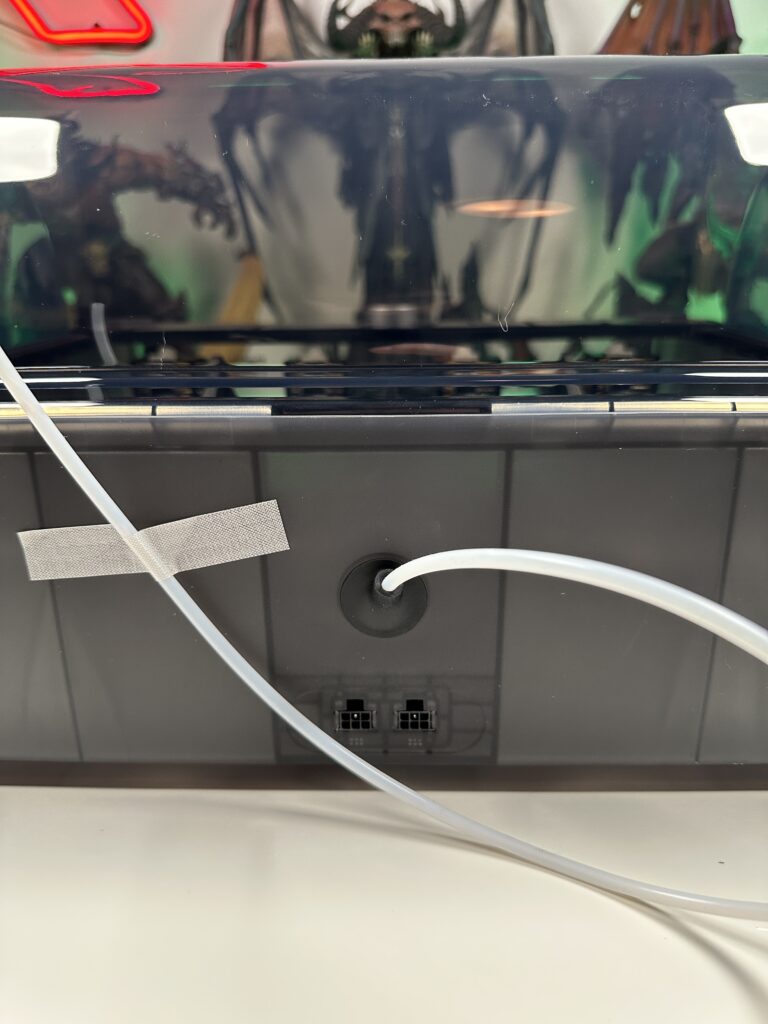
In case you bought the combo version together with AMS then things are a bit more complicated. Right in the centre of the back of the X1 is a hub-like device. First, you need to clip the clear tube from the AMS to the left side of the hub, then the 6-pin cable will go right under the tube to both the AMS and the hub. And finally, the 4-pin cable from the bottom of the hub will end up right under the mount of the spool you installed in the previous step.

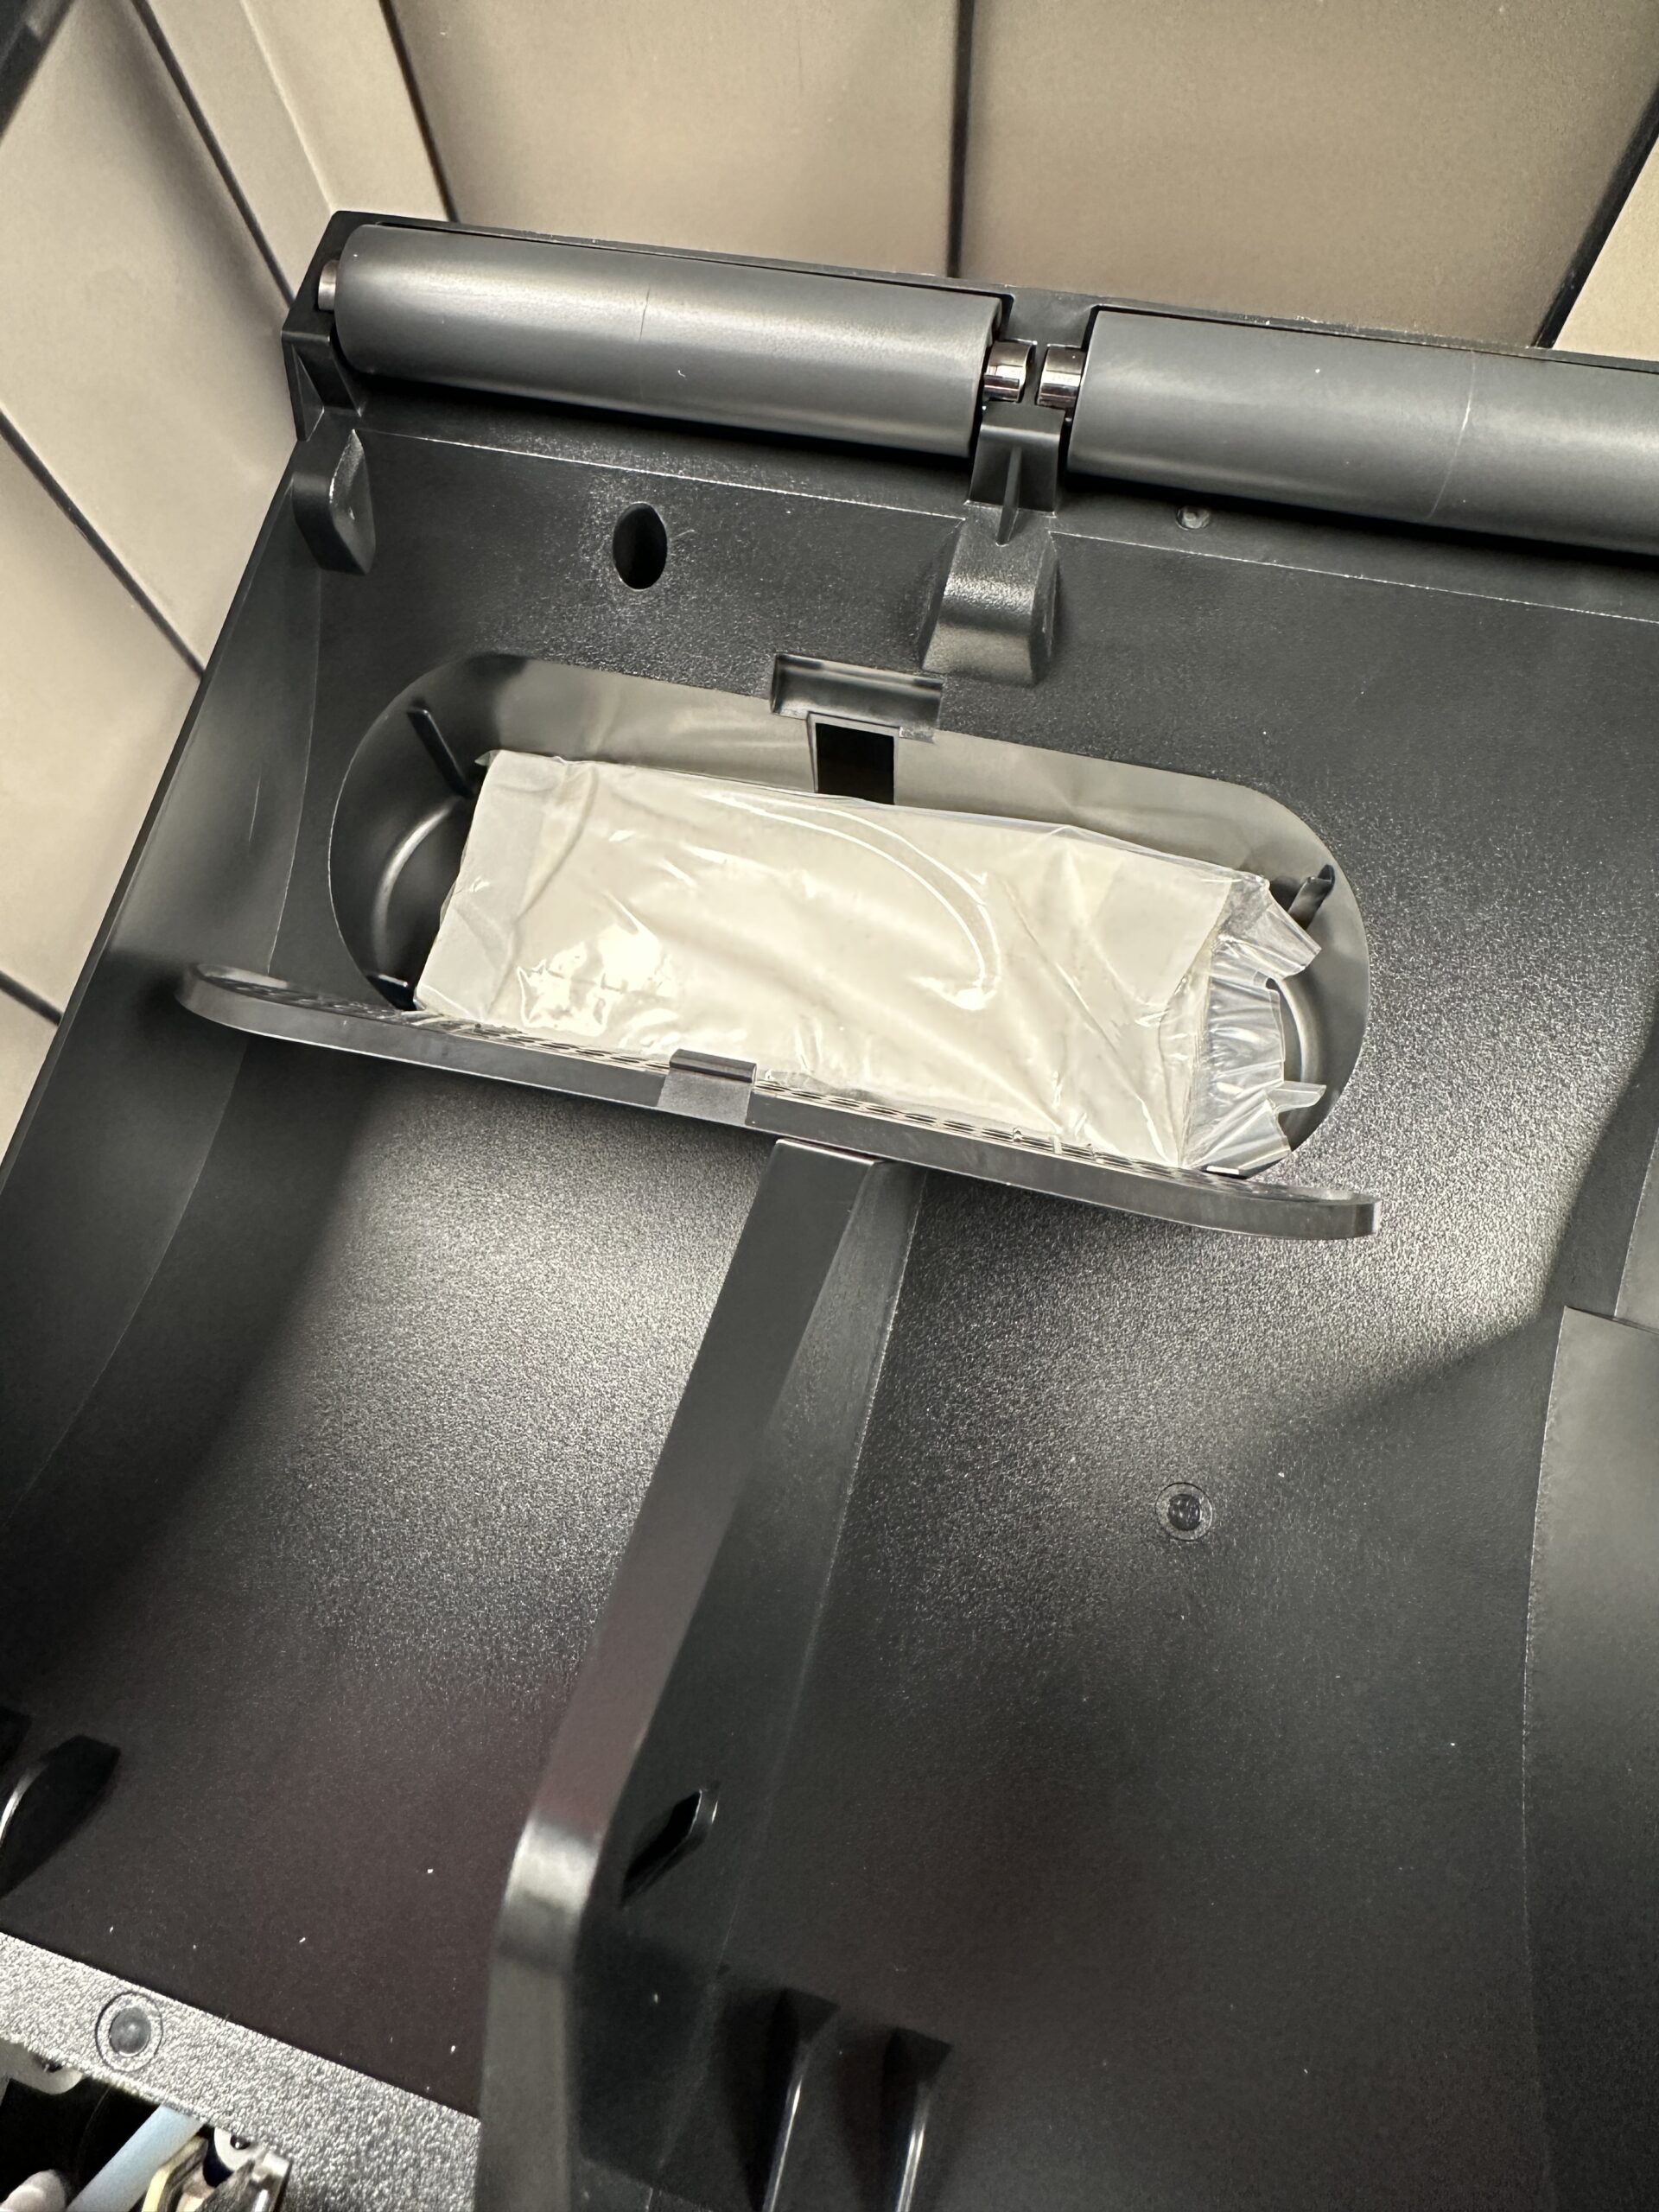
Your last step is to put at least one filament inside the AMS. But before you do that, you will see that AMS has two “pockets” and inside there are two plastic bags. You have to remove the plastic wrap and leave the bags. These bags are classic silica gel that absorbs moisture. They will keep moisture out of the AMS and our filaments dry.
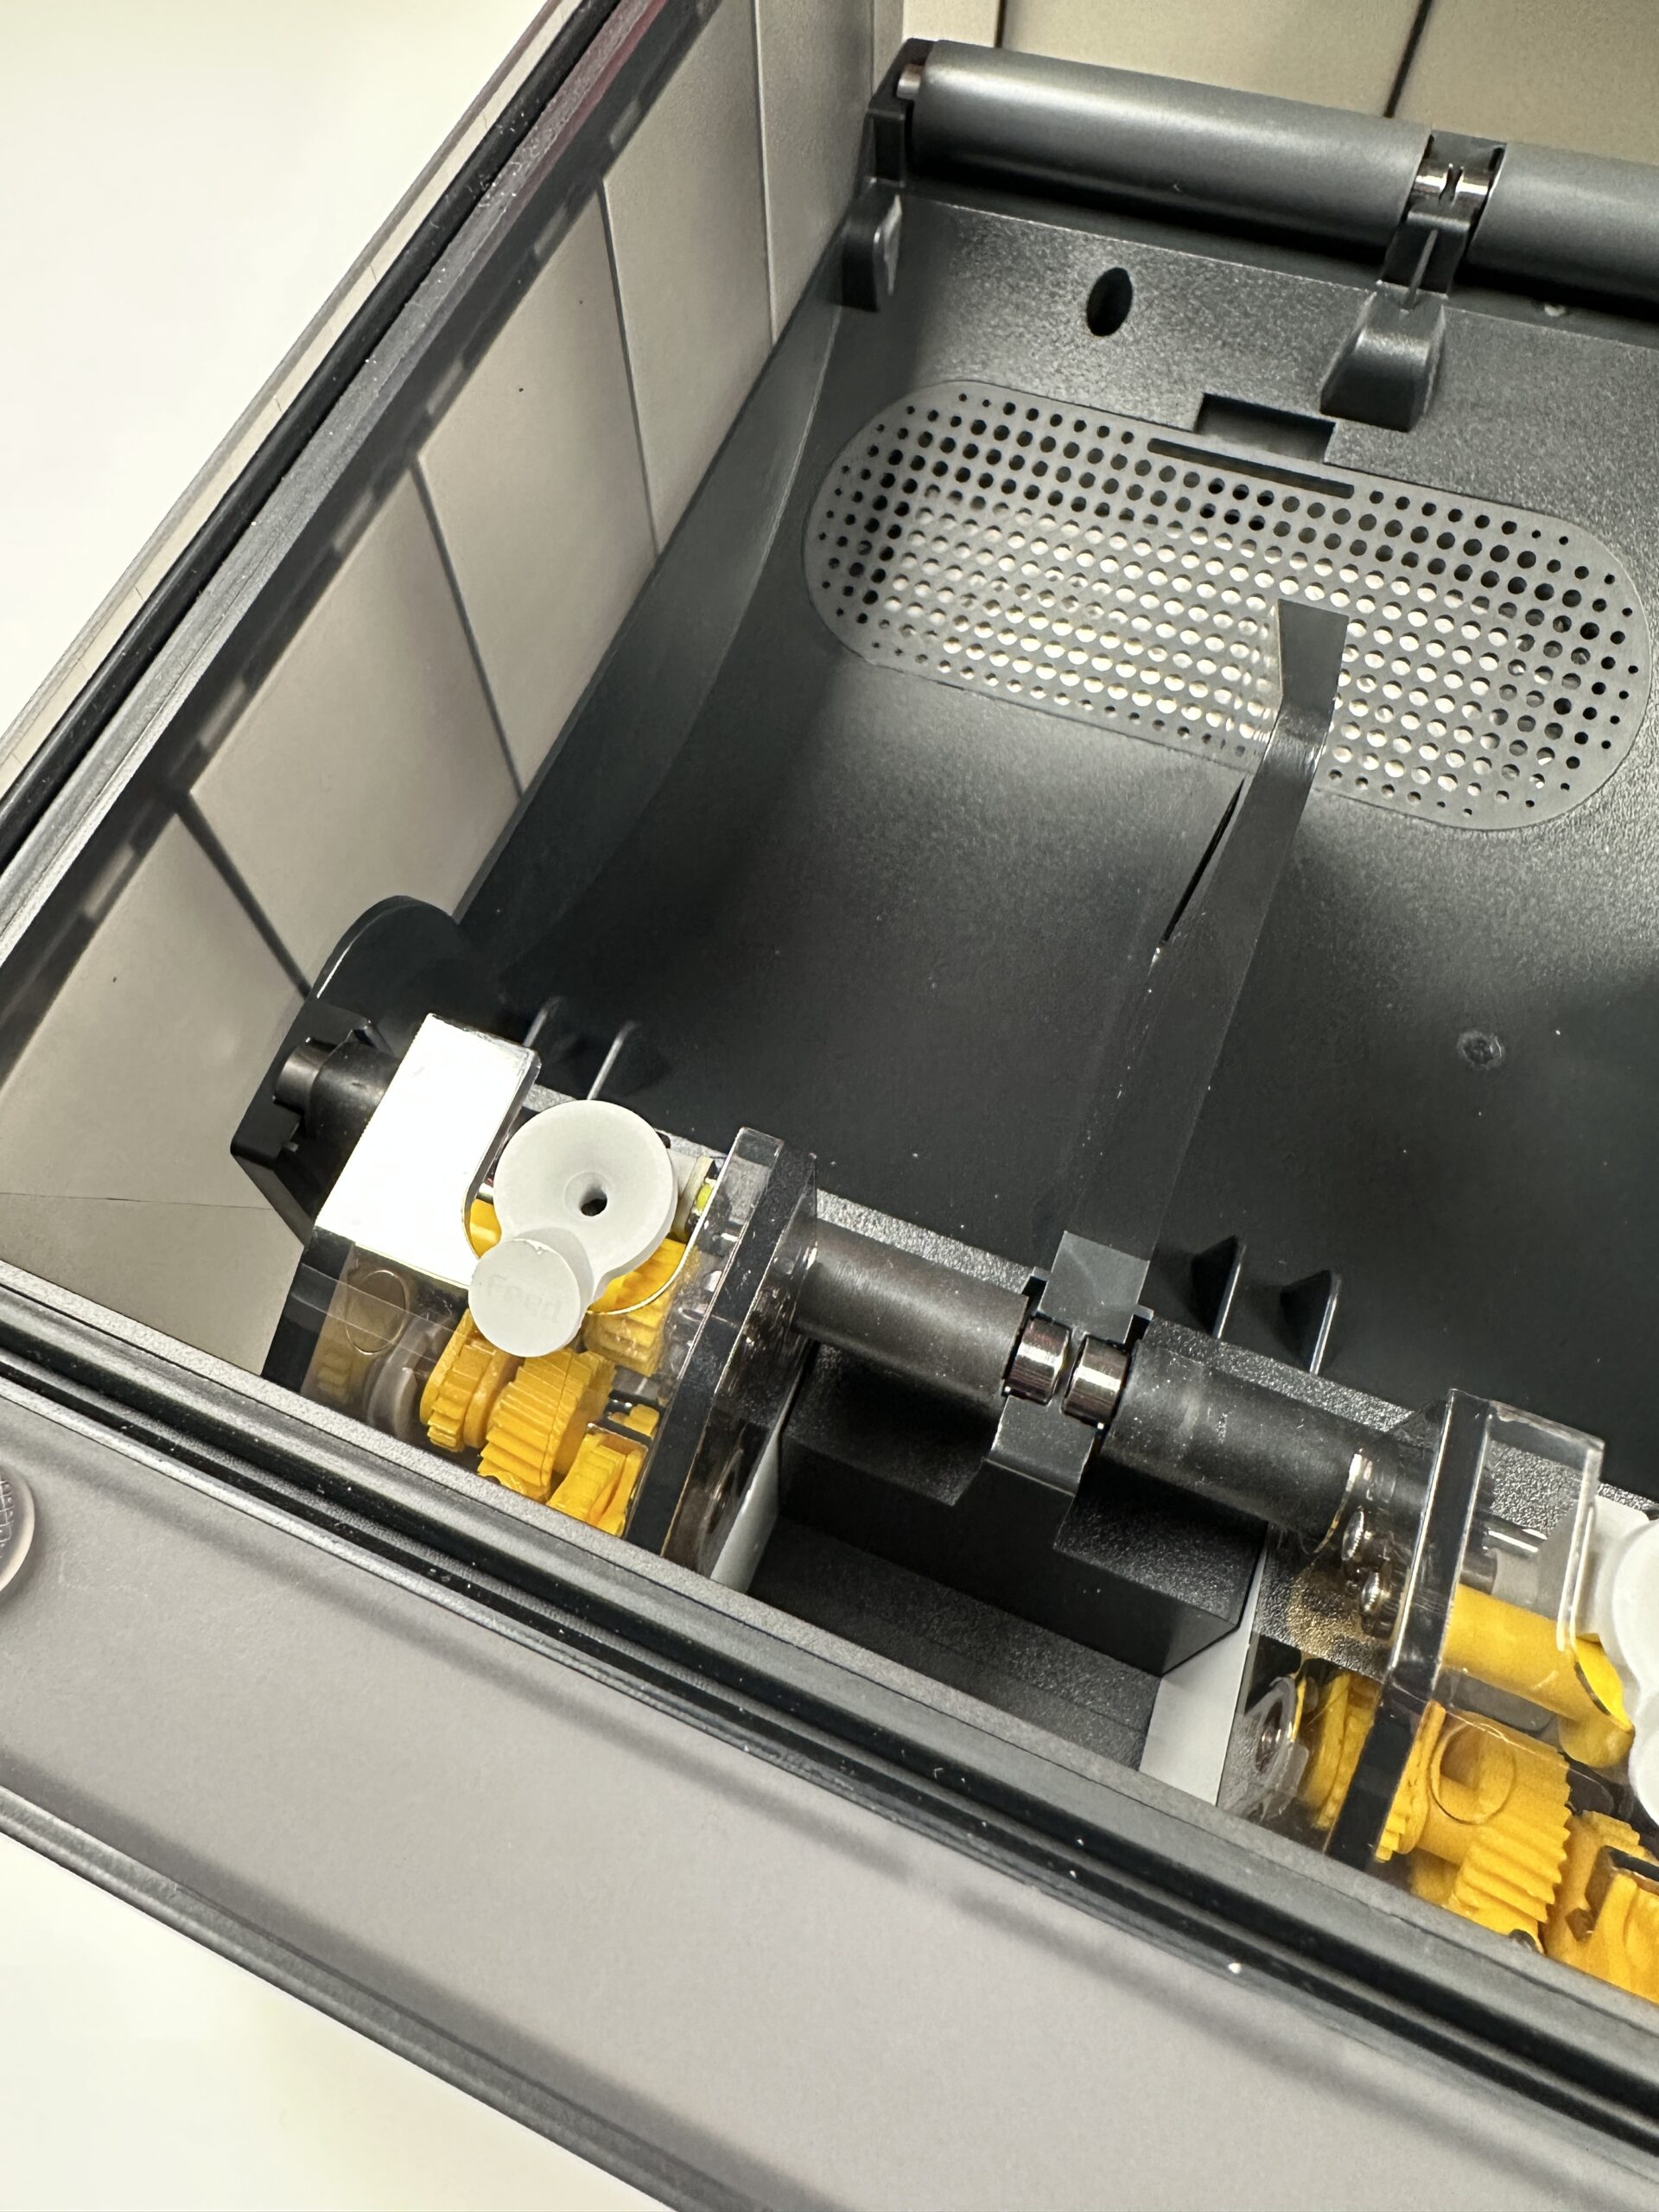
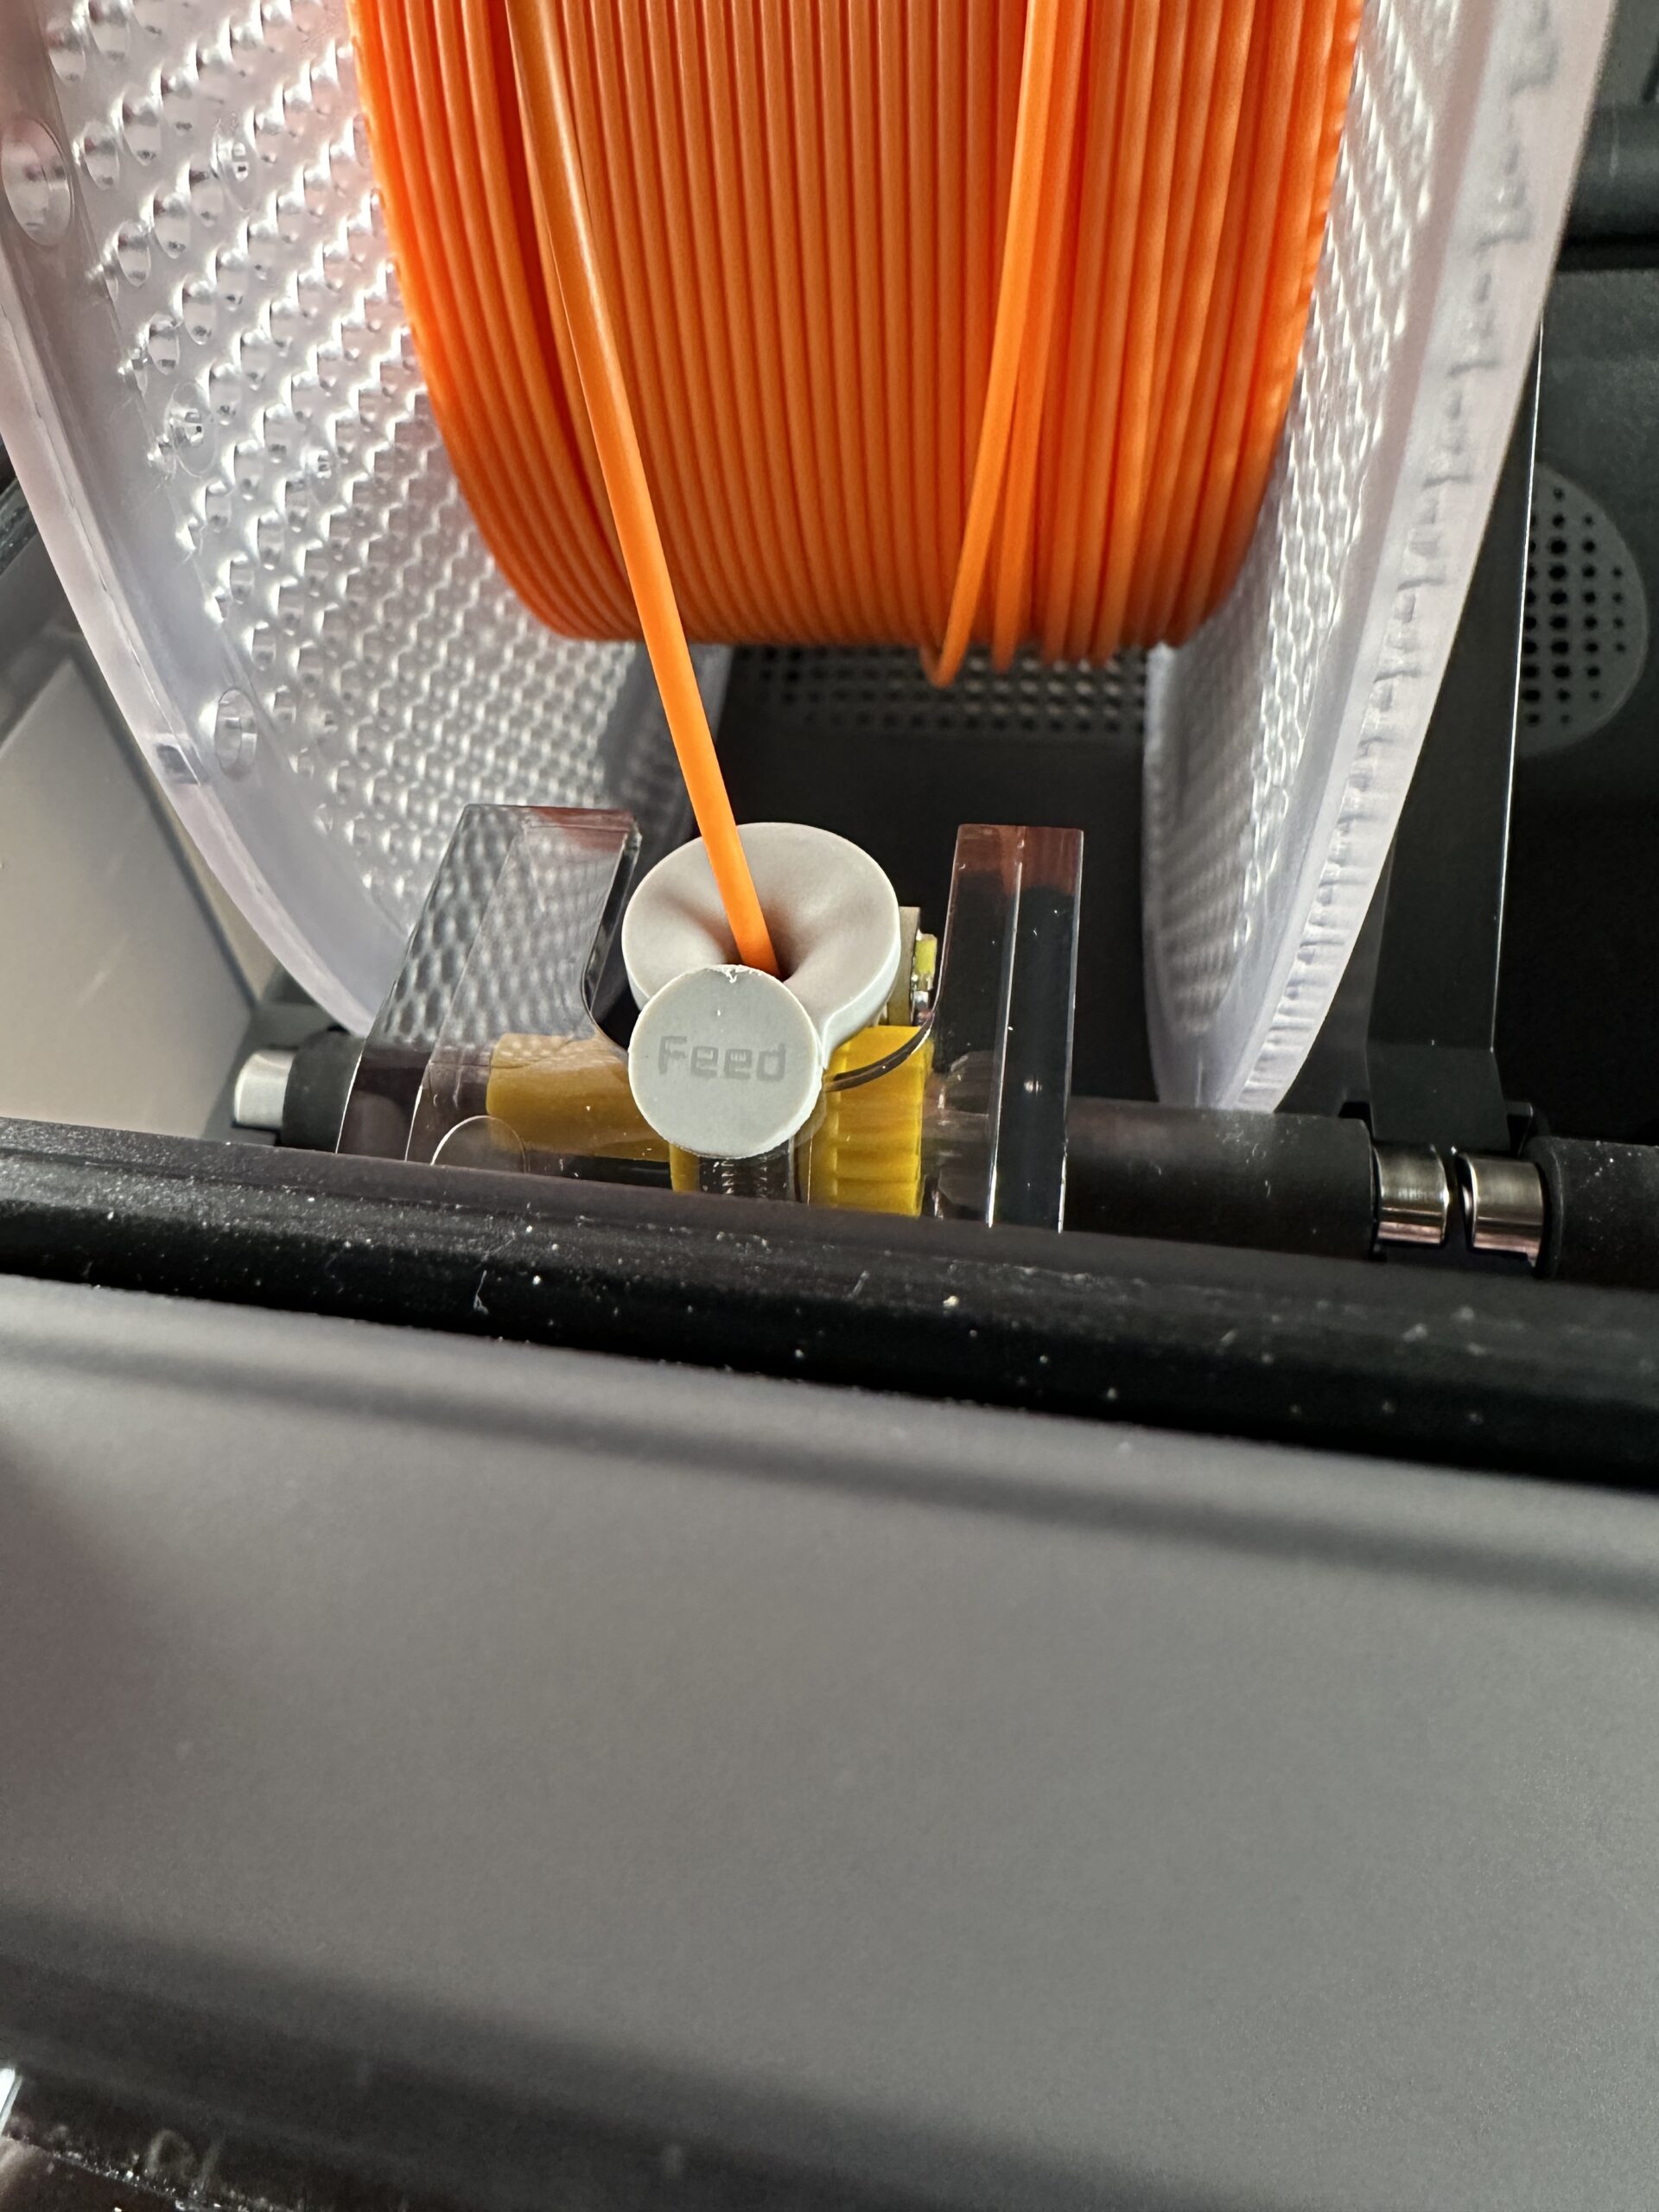
By placing the roll on one of the 4 mounts, it will sit in such a way that it rotates easily. You have to press the plastic that says “Feed” and install a small part of the end of the filament. As soon as you turn on the printer, it will automatically pull the filament and read it to transfer the type of filament and its colour to your screen.
That’s it. You can plug in your new printer and turn it on.
Basic adjustments
As soon as you turn on the printer, the print bed will rise and you can finally remove the last foam pieces from under it.
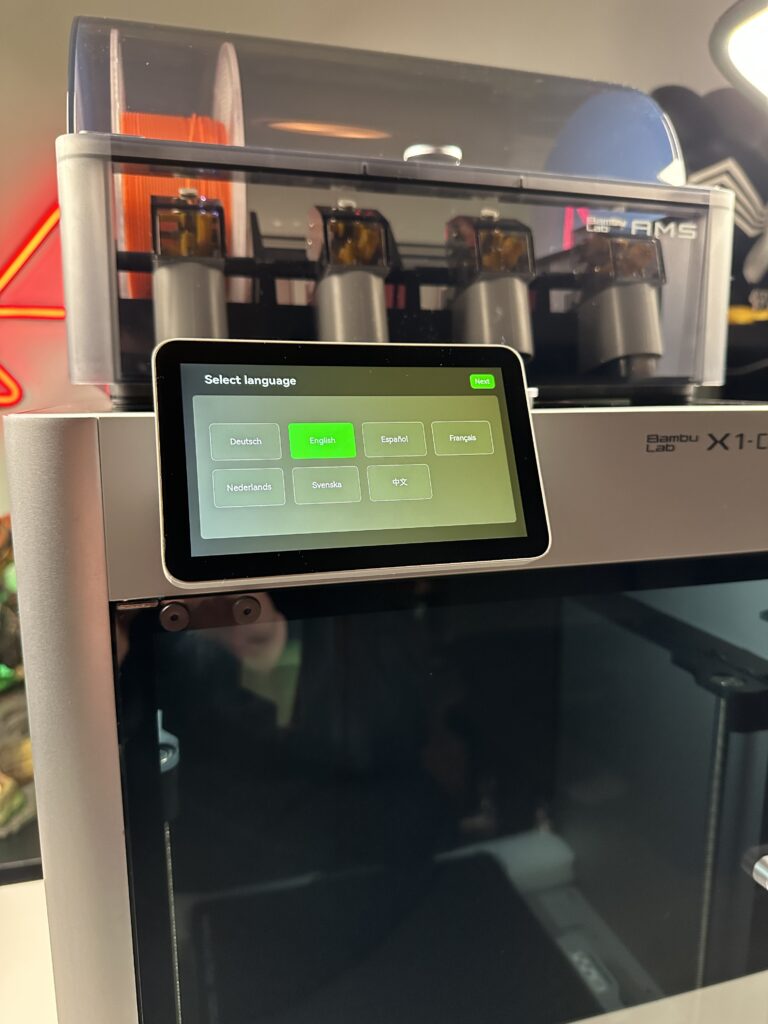
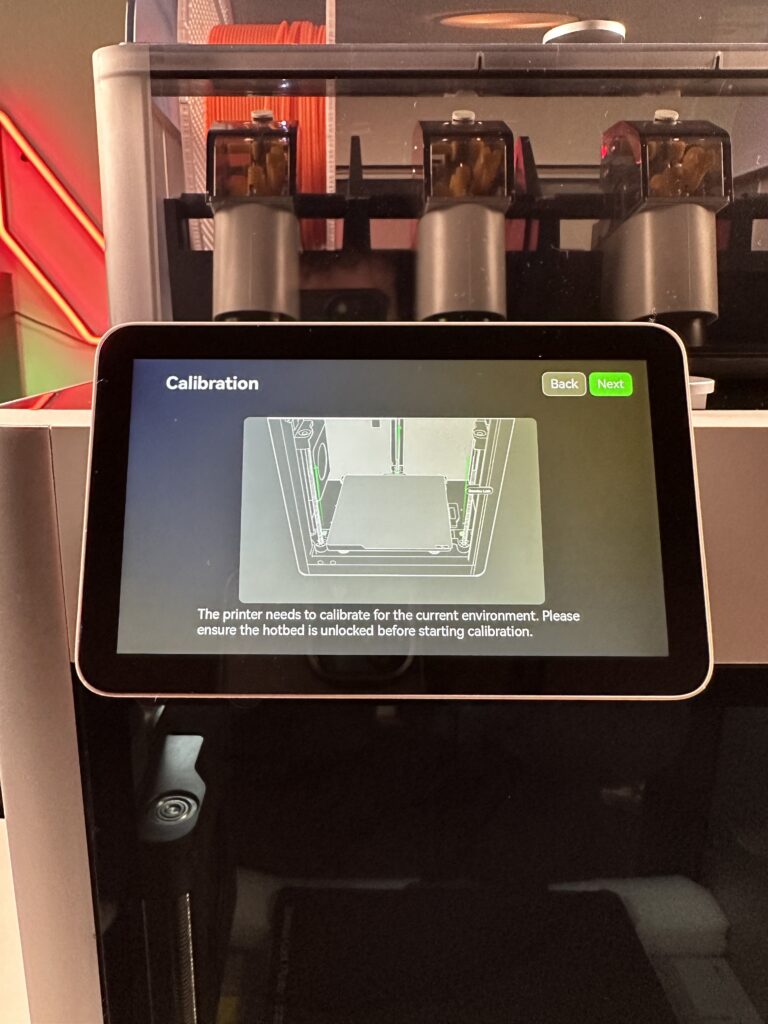
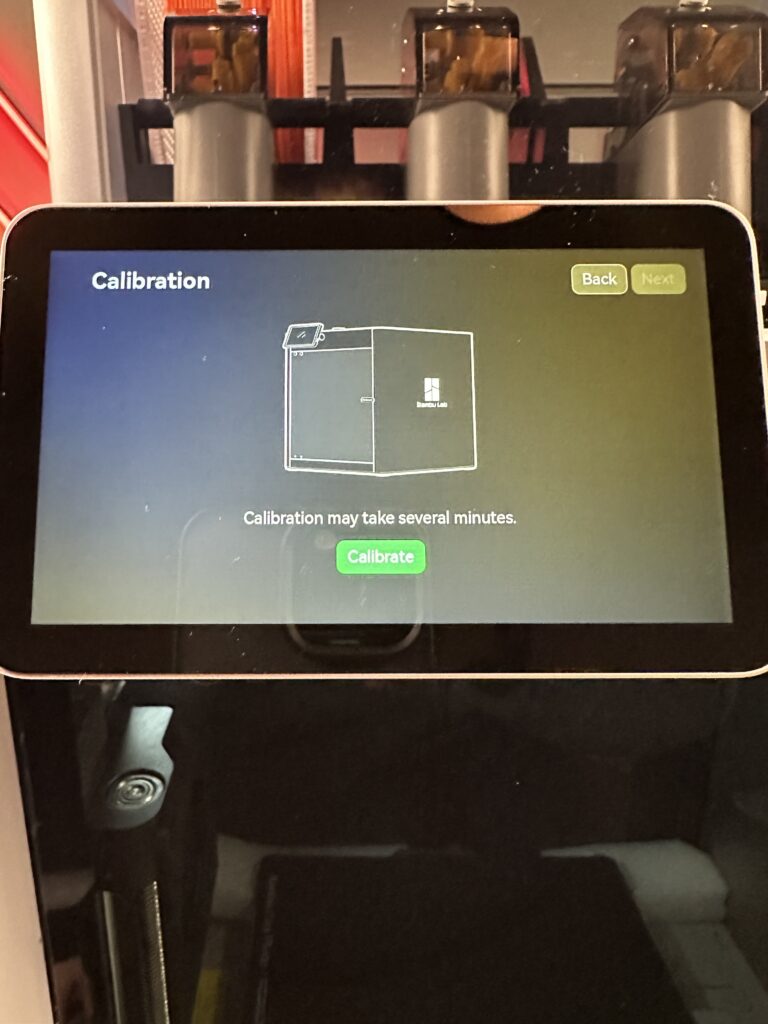
On the touch screen, you choose the language you prefer and then you have to do your first calibration which will take a few minutes. During the calibration, the printer will make many, loud and strange sounds (and scary I would say). This is normal because it adjusts the vibration levels of both the bed and the print head.

Finally, a notification informs us that there is new firmware available for both the printer and the AMS. Don’t skip the firmware update. This was the last step of the setup. After connecting to Wi-Fi and logging in with your Bambu Lab account, you are taken to the main page of the printer.
Design and features
Now that the functional part is out of the way, let’s take a look at the features that make the X1 stand out from any other printer on the market.
The exterior of the Bambu Lab X1 Carbon Combo
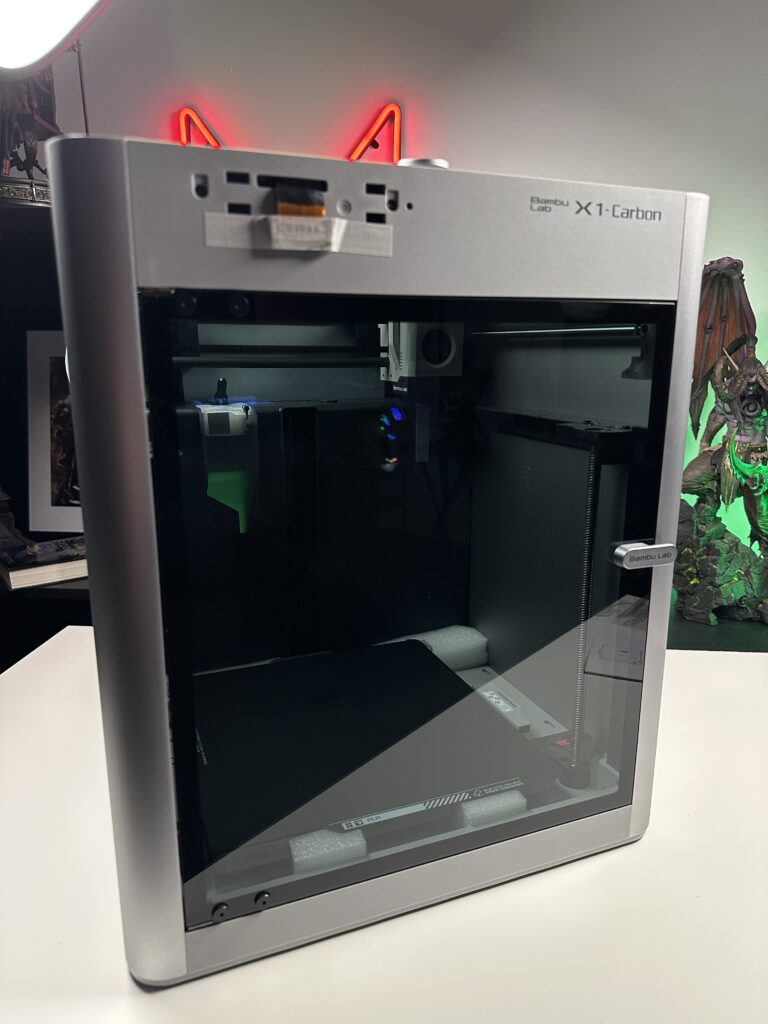
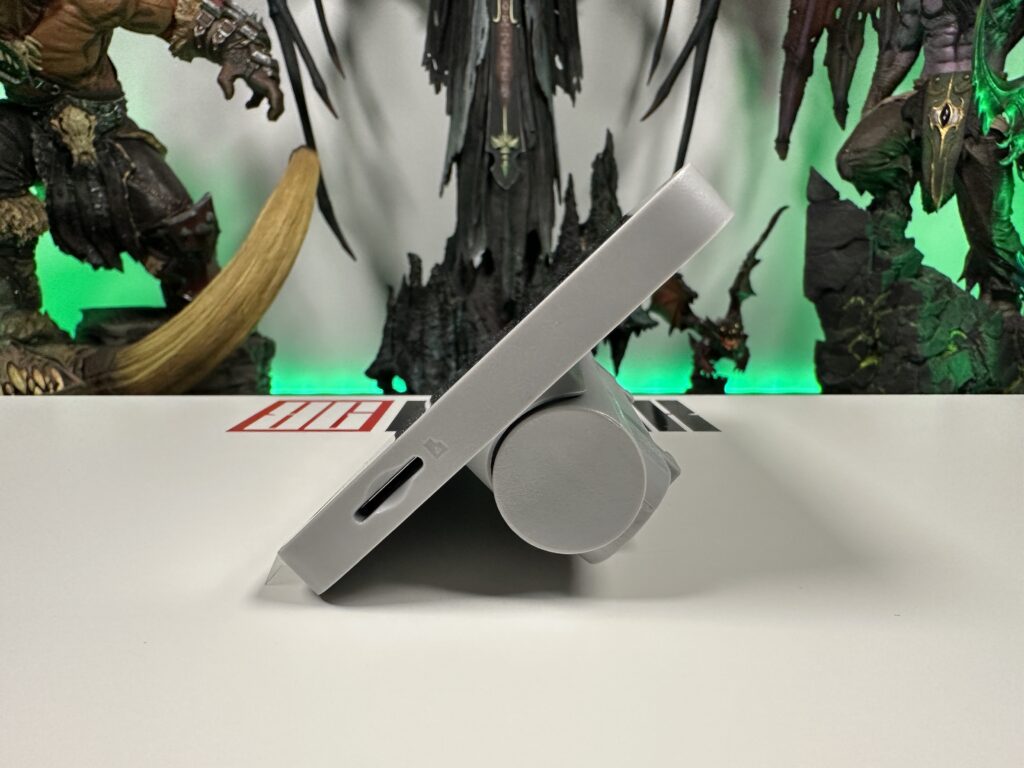
The Bambu Lab X1 Carbon Combo is truly a gem in the world of 3D printers. Up until now, every printer I’ve had is either in the garage or in a storage room and I use them there. But the X1CC is so beautiful and well-designed that I don’t feel like doing the same. I reserved a corner in my gaming room and have placed it there to stare at daily.
The entire exterior is made of aluminium on the Bambu Lab X1 Carbon Combo. In the simple version of the X1, these pieces are made of polycarbonate plastic.
The front side of the printer has a tinted glass door that closes with the help of magnets, and on the right side of the door, it has a metal handle with the company name. At the point where the door closes, there is rubber to absorb shocks during printing, as well as a sensor that checks if the door is closed or not.
The same goes for the top of the printer. A square tinted glass sits on a rubber base that closes airtight. On the front, a similar metal handle but with the company’s logo this time, helps us to lift the glass.
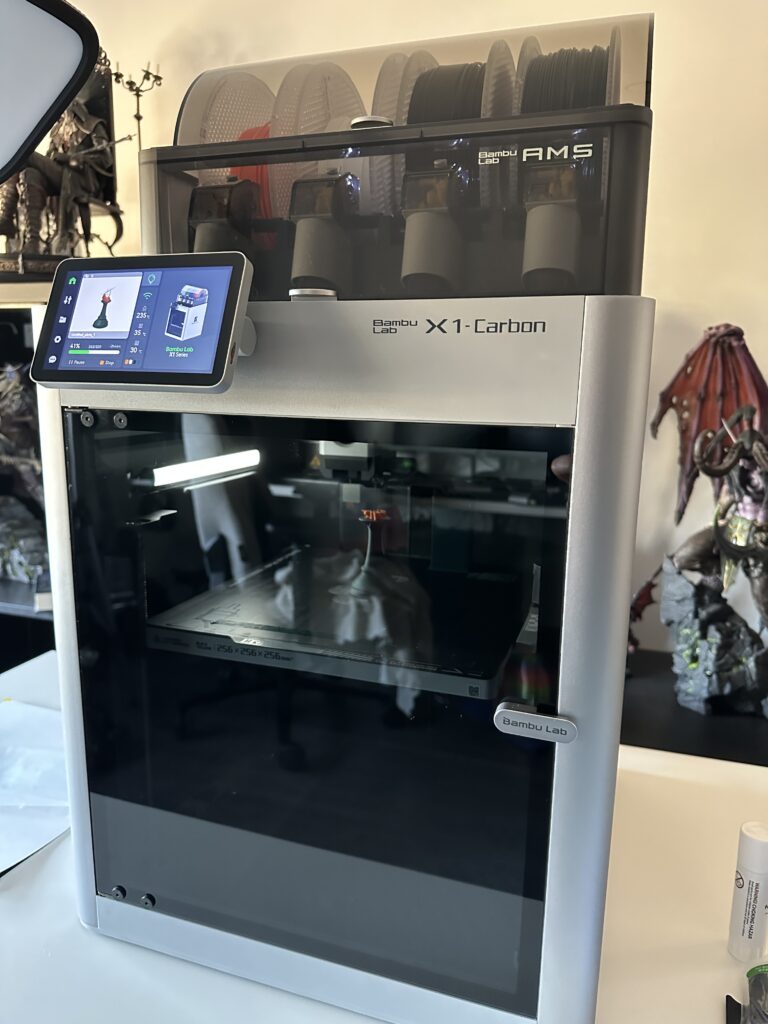
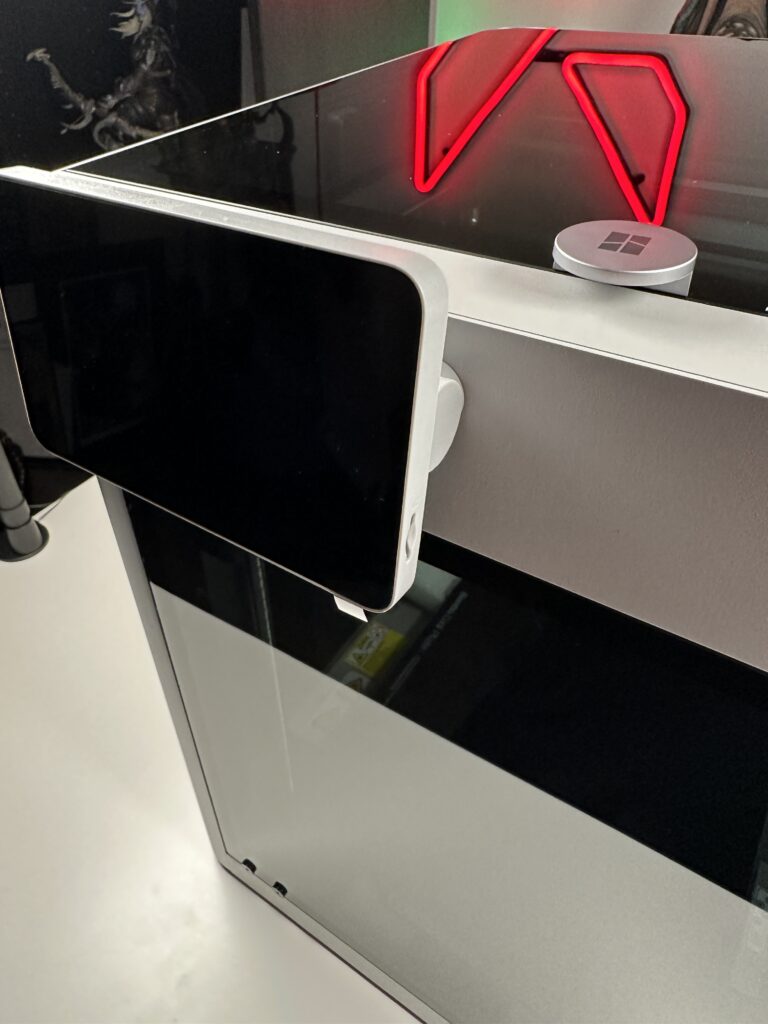
The touch screen
On the front top left of the printer, you have a 5.5-inch touch screen, for using the printer. As I mentioned above, on the right side of the screen, there is a port for an SD card that can be used to print files from it, as well as to save time-lapse videos. Personally, I prefer to send the print files over the cloud, instead of taking in and out the SD card every time.
It’s also worth mentioning that the monitor stand has an adjustable tilt, so you can put it at the right height every time you move the printer to a different level.
The screen is of good quality, with the right level of brightness offering good viewing angles and responding to touch without delay.
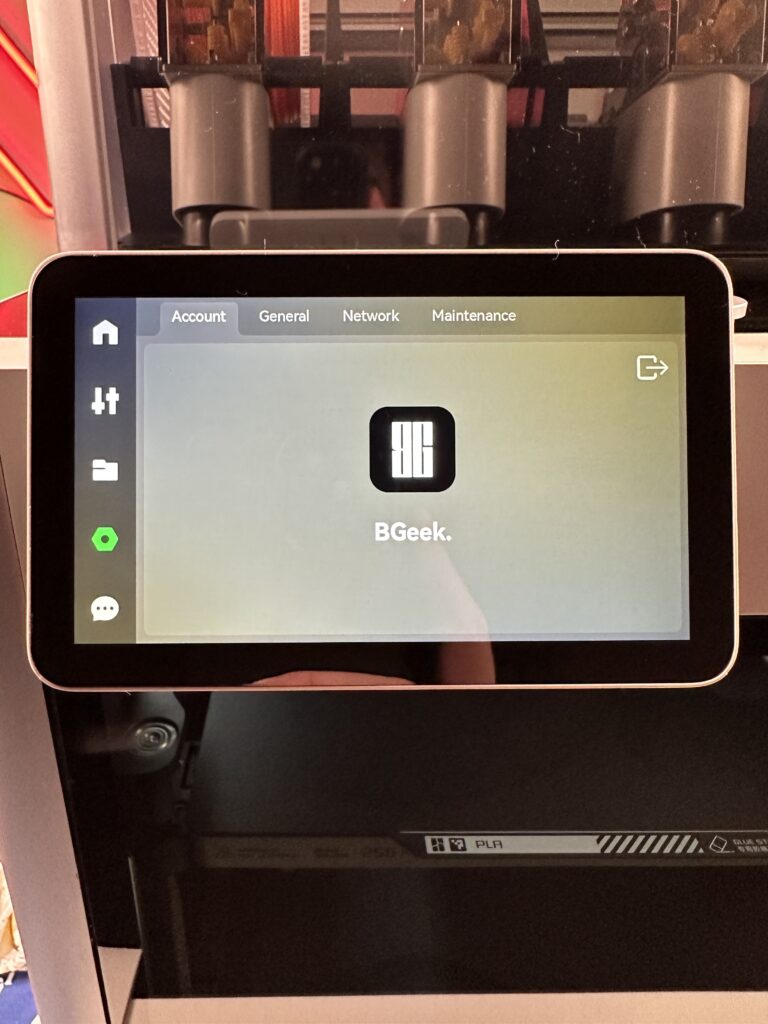
The menu is nicely designed and easy for new users. It has a number of functions that can directly configure the printer.
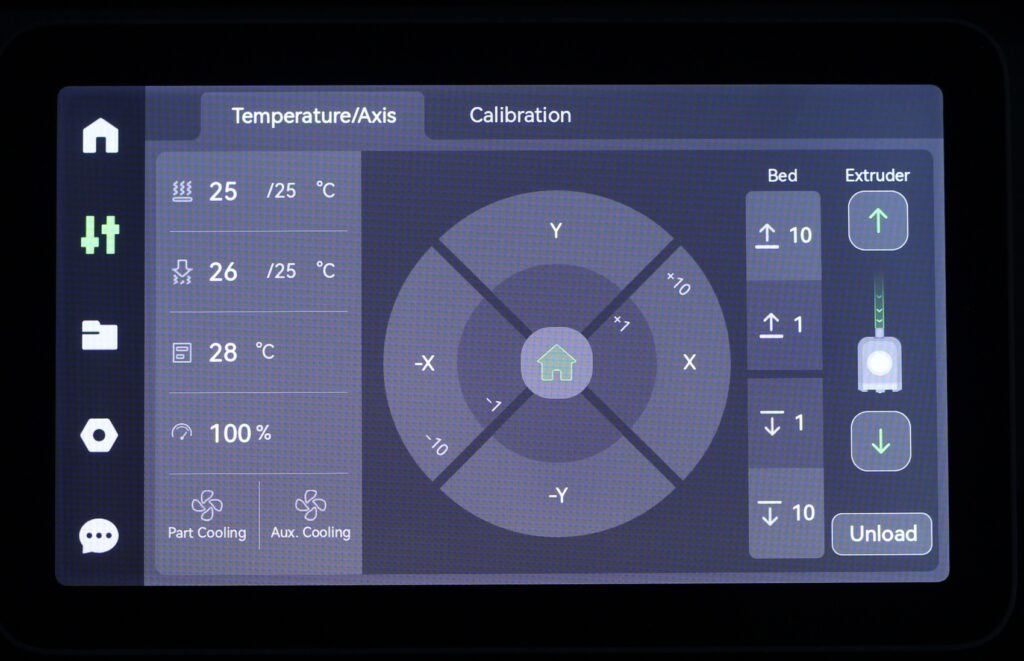
On the left, you have all the tabs with printer options. Such as the home page, motion and calibration settings, folder with printable models, general printer settings and messages. Messages show notifications if printing fails and the reason.
While you are on the home page, on the right, there is a status column that informs us if the printer is connected to the wireless network, the temperatures of the bed, the nose and the interior of the printer as well as the colours loaded in the AMS.
The interior
The interior of the Bambu Lab X1 Carbon Combo is where all the magic happens.
Printing bed
The X1CC offers a 256x256x256mm print capability. The print size may sound small but when you consider that the size of the entire printer is 389x389x457mm, you understand that the size for such a compact printer is not so bad. It also impresses me, every time I think about the technology they managed to cram into this printer. To be honest though, since I like to print life-size heroes helmets, the bed isn’t big enough to print them all at once and I need to break them into pieces. I’m not complaining though because even then, the print takes about 1/4 of the time it took for a full helmet. You win something, you lose something.
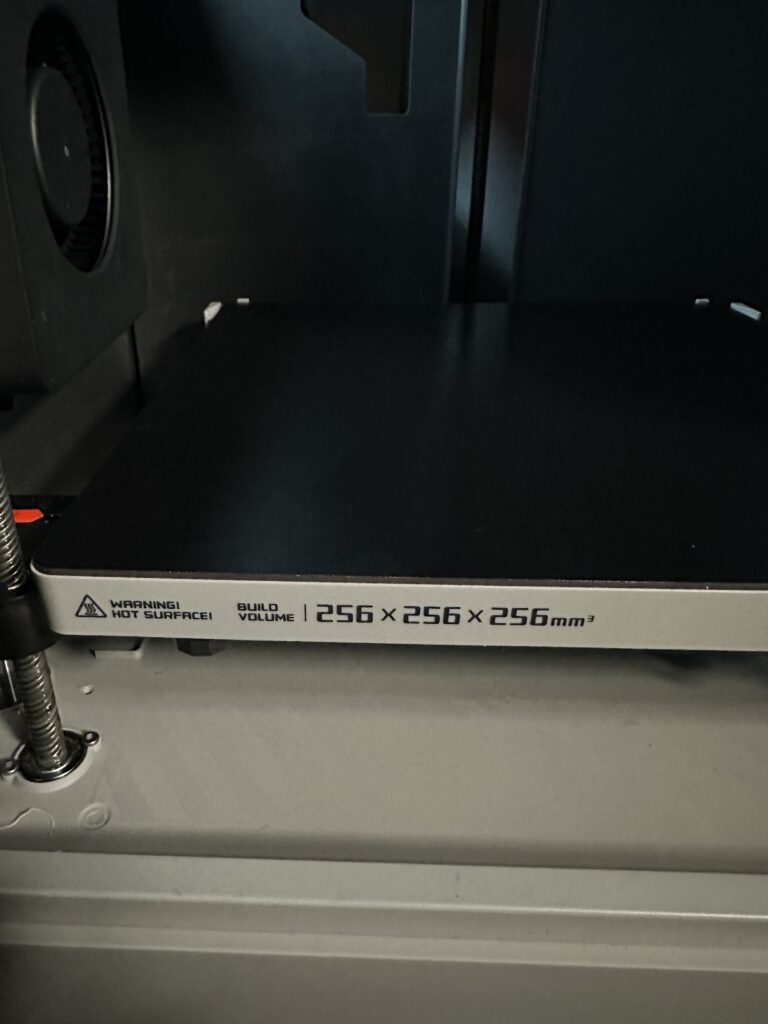
The bed appears to be made of aluminium and underneath there are magnets that hold the flexible print plate in place. At the rear corners of the bed, there are raised grey plastic corners for quick alignment of the plate onto the bed. They do their job so well that I can place the plate in the correct spot without even looking.
Double-sided Magnetic Flex printing surface
The X1CC comes with a double-sided magnetic flex plate. One side is called “Bambu Engineering Plate” while the other is called “Bambu Lab Cold Plate”. The cold plate is suitable for PLA filament as it provides the best adhesion. Its surface is covered by a print sticker, so it can be easily replaced when the time comes after a lot of use. Bambu Lab always recommends using the glue stick that comes with the printer. This helps the models stay in place while the bed is warm and easy to remove when the bed cools down. In this way, you protect the print sticker and give it a longer life.
Bambu Engineering Plate is best used for filaments such as ABS/ASA/PETG/PA/PC/TPU. It has a coating that helps with adhesion when printing with high-temperature materials or with flexible filaments. This side does not have a print sticker, so it doesn’t really need protection from the glue stick, but even for this side, Bambu Lab recommends using it.
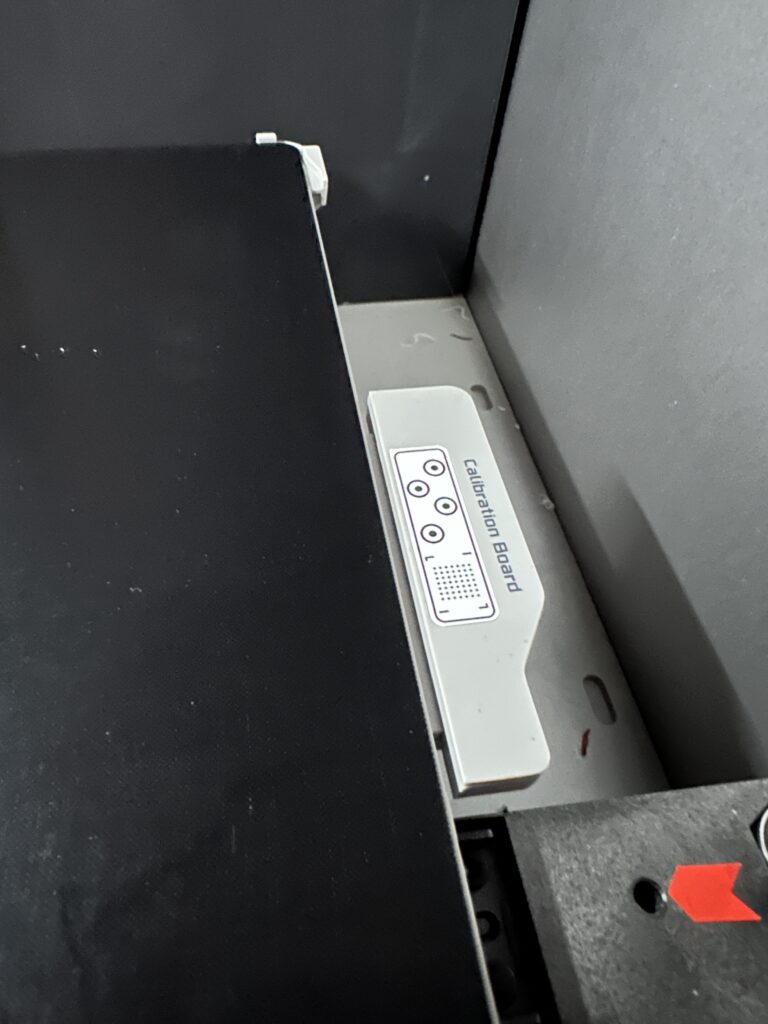
On the right side of the bed, there is a calibration board which is a pattern that is used by the LIDAR sensor to do the general calibration before starting the control of the first layer and the nozzle’s flow rate.
Custom Extruder
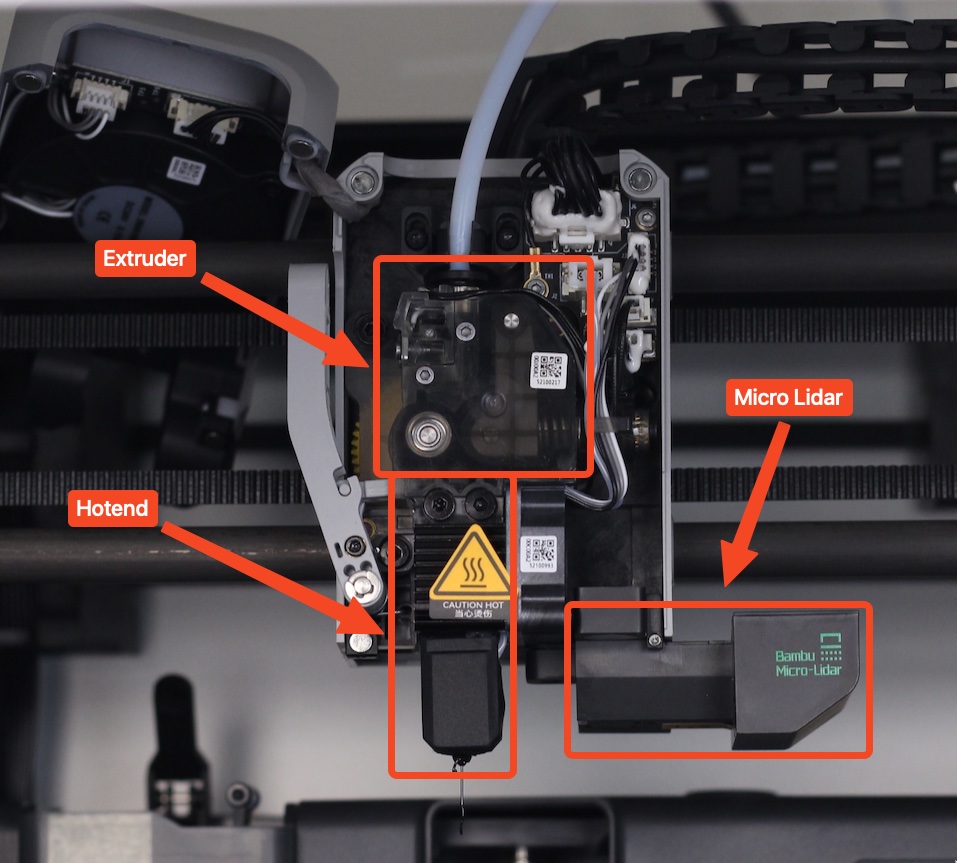
The Bambu Lab X1 Carbon Combo has a completely new print head, with a custom extruder. The extruder is responsible for pulling the filament from the spool and feeding it to the hot end where it is melted and pushed through a small nozzle to create the printed model. It is also one of the most important parts of a 3D printer because it must be able to precisely control the amount of filament that is pushed through the hot end.
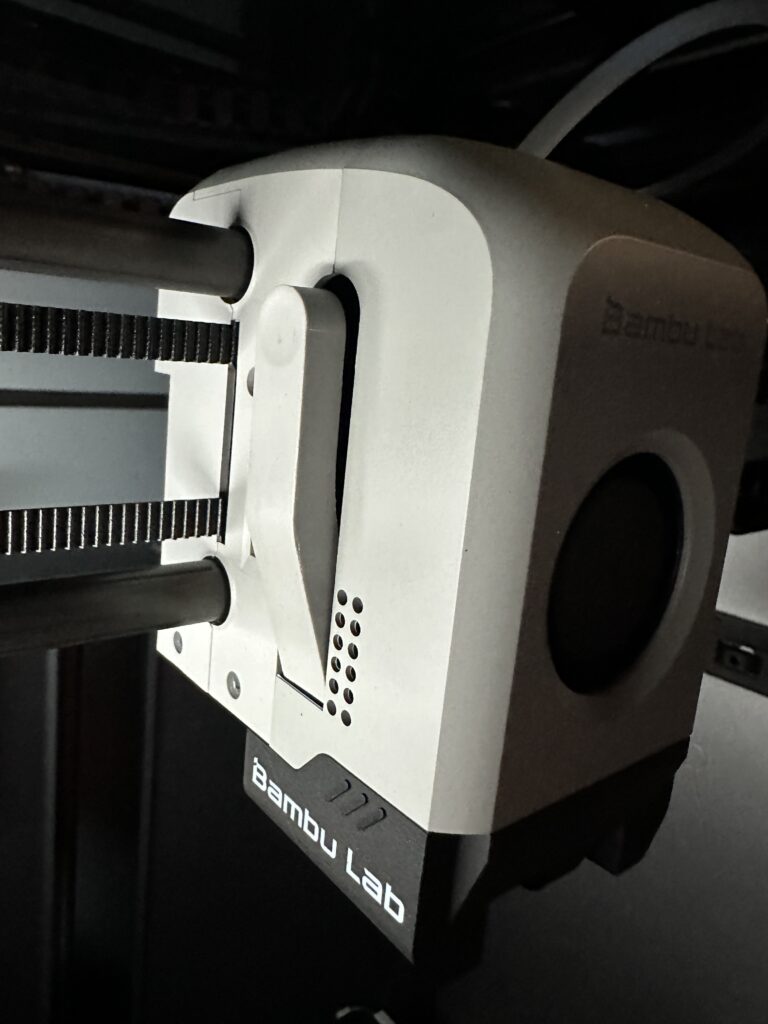
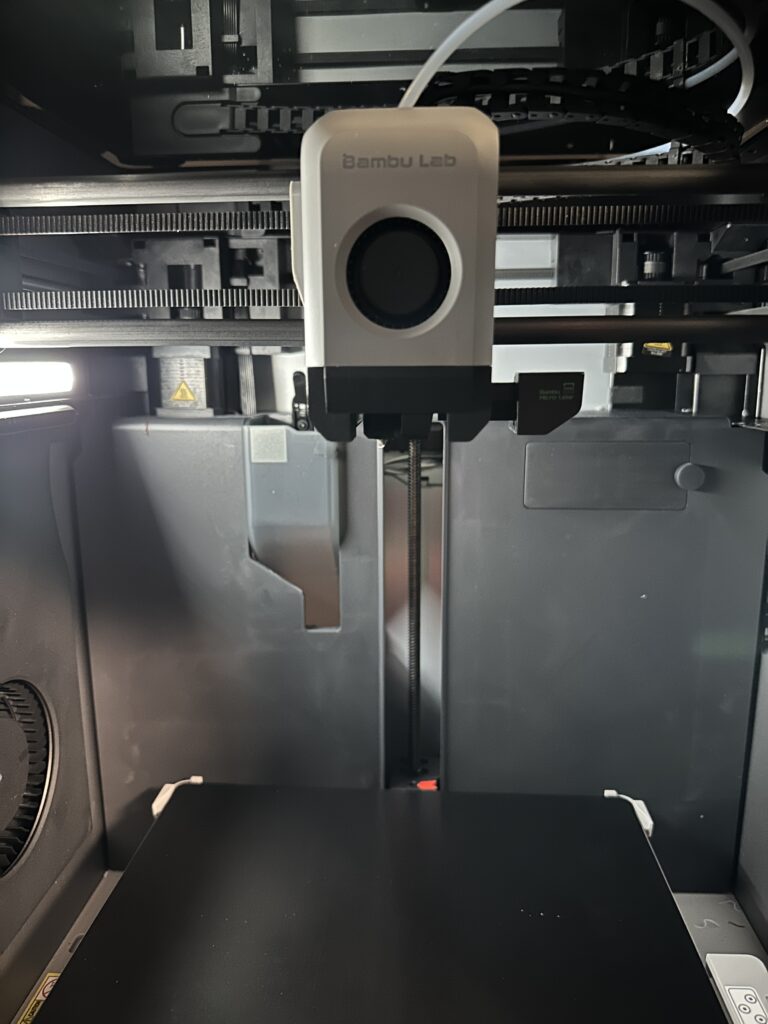
The front cover of the extruder is magnetic and easily removed if you need to change the hot end. In this cover, a radial fan 5015 is installed and used for partial cooling. There is also an illuminated Bambu Lab logo on the top which is a detail I really liked.
On the upper left side, there is a thread sensor. Below this sensor, the extruder gear and spring keep it under tension. A small razor is placed between the hot end and the extruder which is pressed during printing and cuts the filament before unloading it, reducing the risk of clogging the hot end. On the bottom right you’ll find the Micro Lidar.
CoreXY motion system and the Z axis
The Bambu Lab X1 Carbon Combo uses a CoreXY drive system controlled by two motors. The X and Y motors work together to move the print head. Each motor has an independent belt that connects to the printhead, so a pair of belts are used to control its position.
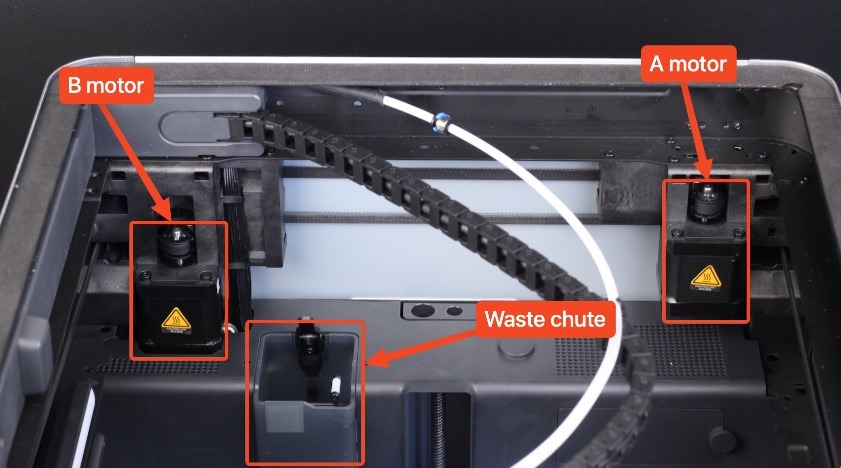
The 2 CoreXY control motors
Having a CoreXY drive system allows the X1 to print much faster compared to a traditional printer because the weight is lighter, which is important when it comes to fast printing. Of course, the fact that the rods are made of carbon also helps. High speeds result in faster wear. Although Bambu Lab says this particular piece is maintenance-free, I want to see how long it will hold up to heavy use.

The Z-axis consists of three screws connected to a single stepper motor using a belt. Other printers use a fixed bed for automatic bed levelling, but this is not the case with the X1. The X1 comes already levelled from the factory and also features two other types of levelling systems to ensure that printing is successful every time.
Generic but special features
12W fan, LED light, camera and active carbon filter
On the left side of the interior, you have a large fan, which is needed when printing something at high speeds. It sends the air up to the last layer of the model to solidify it quickly. Without this fan, it would not be possible to print the benchy at ludicrous speed without failing. This fan also controls the temperature inside the printer.
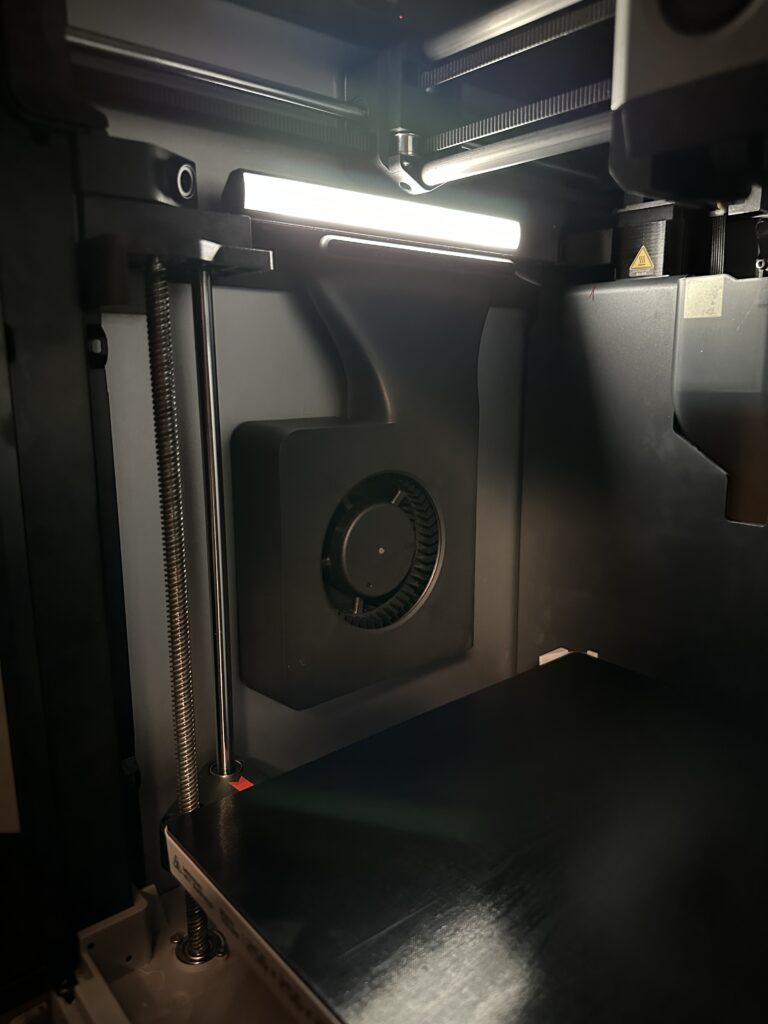
Above the fan, you have a nice LED light that isn’t super bright but is good enough to illuminate the model. Why do you need it? Mainly because the X1-Carbon comes with a 1080p camera that allows you to monitor the print in real-time and allows you to save time-lapses to the SD card.
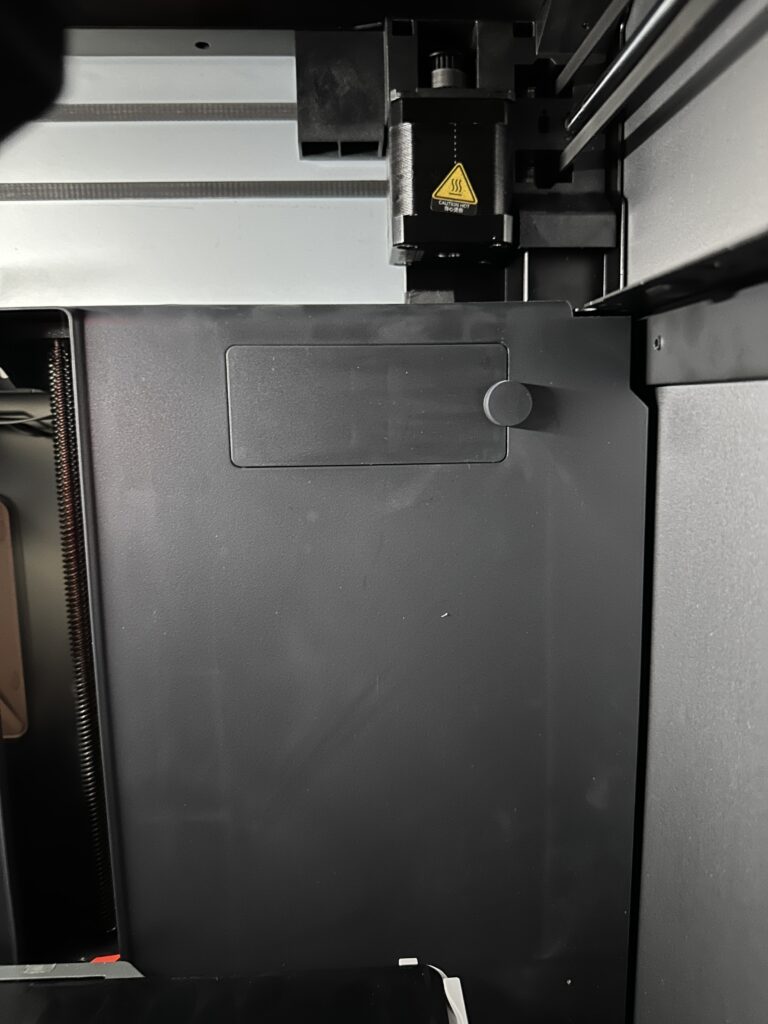
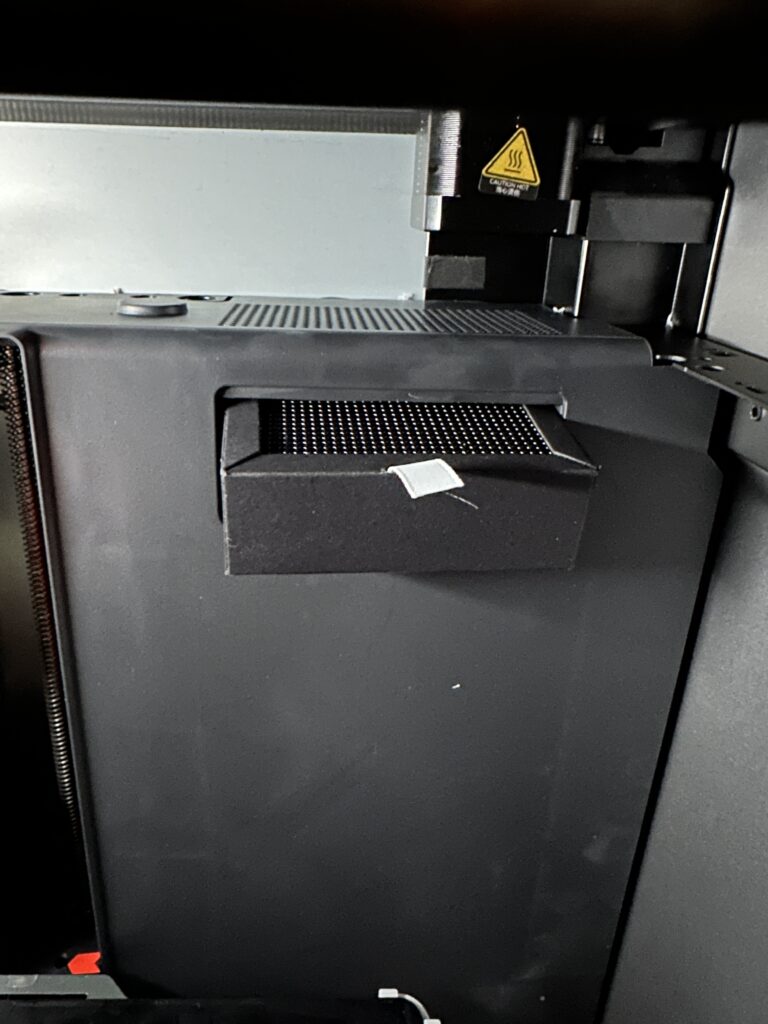
Finally, on the back of the printer, there is also a removable activated carbon filter, useful for eliminating odour and filtering out any microplastics created during printing. The filter is relatively small and while it does a pretty good job of filtering out the smells from the PLA, I wouldn’t say it does as well as the ABS filaments.
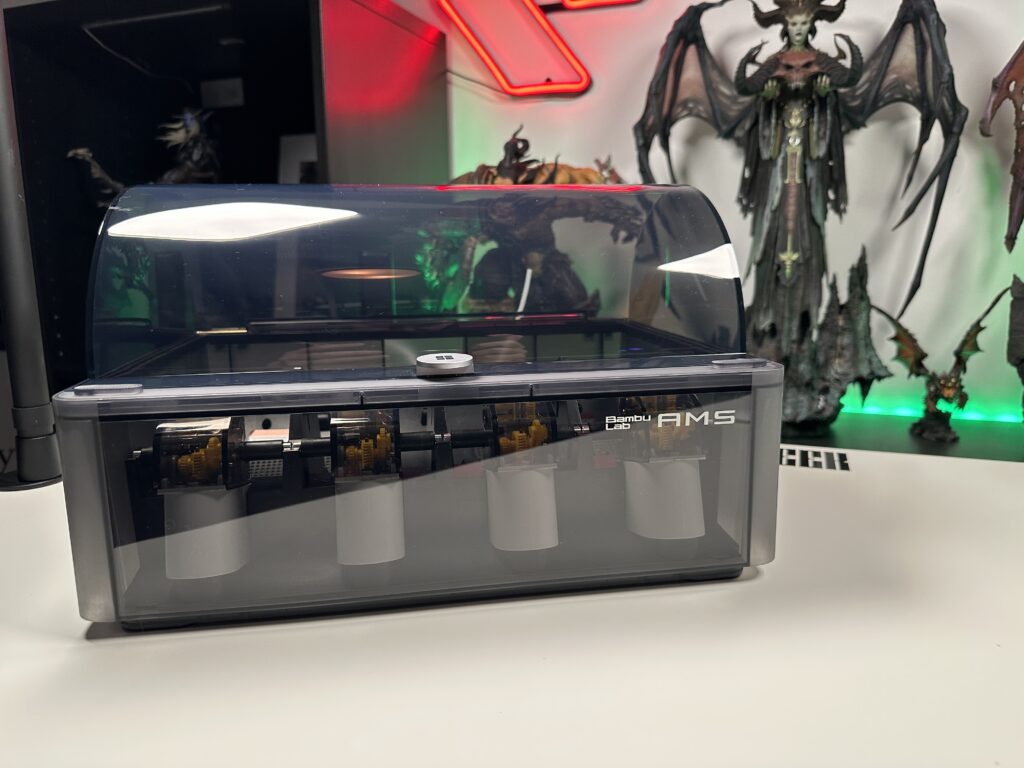
Bambu Lab AMS
The Bambu Lab AMS is a smart device that allows printing up to four different colours. In case four colours aren’t enough, the Bambu Lab X1 Carbon Combo is compatible with up to four AMS simultaneously, for a total of sixteen different colours. Really impressive! Understandably, this has its drawbacks. Every time the printer needs to change colour, it has to clean the nozzle from the previous colour, thus spending more filament than it would have spent in the first place. Also, the printing time increases for each different colour you add to your print.
Each spool of filament sits on two rollers. The front rollers are motorized and covered in rubber to provide a better grip. The rollers rotate for the AMS to load the filament into the printer as well as rewind the filament in case of a colour change.
The AMS material is transparent plastic so you can see at any time which colours you have loaded into the AMS. On the front of each base is a distinctive white LED. When this LED is on, for example in the third base, it is the indication of which colour has been loaded in the printer.
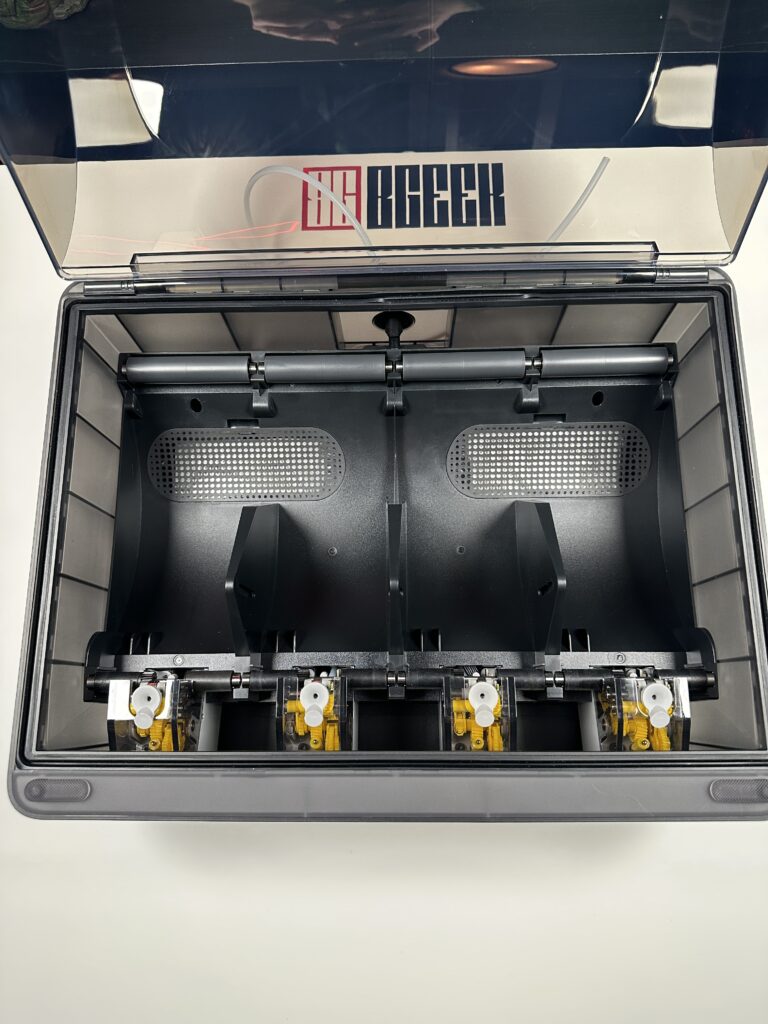
It is worth mentioning here that Bambu Lab does not recommend using carton spools inside AMS. As it loads and unloads the filament, the rollers can create friction and this can wear the carton edges of the spool. So, the solution is to either always use Bambu Lab’s spool or print the spool directly from the files that come with the printer.
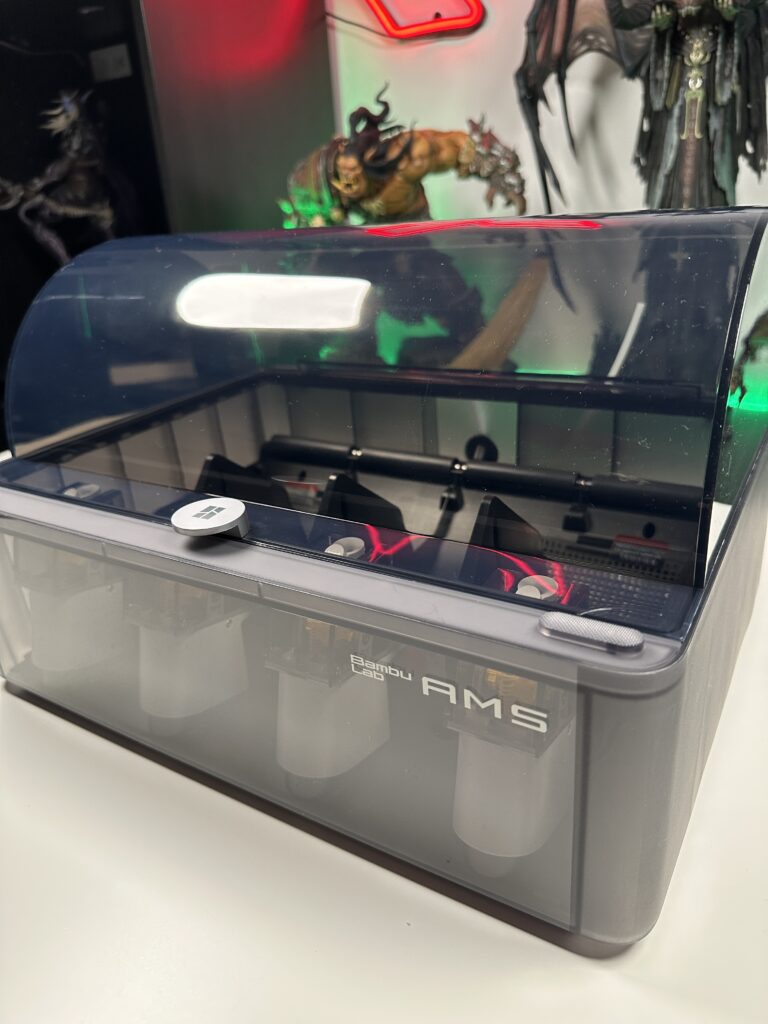
What I missed at first are the two small plastic adapters that work as padlocks. That way the AMS stays locked and keeps the moisture out. These two locks are located on the front top, at the same height as the handle to open the AMS. One on the left and one on the right. You just slide them up and they lock the lid.
If the humidity levels rise inside the AMS, the humidity sensor will make sure to notify you of this so that you can replace the gel packs.
Table of features
| Technology | Fused Deposition Modeling |
| Build Volume(WxDxH) | 256*256*256 mm |
| Chassis | Steel |
| Shell | Aluminum & Glass |
| Hot End | All-Metal |
| Extruder Gears | Hardened Steel |
| Nozzle | Hardened Steel |
| Max Hot End Temperature | 300 °C |
| Nozzle Diameter (Included) | 0.4 mm |
| Nozzle Diameter (Optional) | 0.2 mm, 0.6 mm, 0,8 mm |
| Filament Cutter | Yes |
| Filament Diameter | 1.75 mm |
| Build Plate | Flexible Steel Plate |
| Build Plate Surface (Included) | Bambu Cool Plate, Bambu Engineering Plate |
| Build Plate Surface (Optional) | Bambu Hot Plate |
| Max Build Plate Temperature | 120 °C |
| Max Speed of Tool Head | 500 mm/s |
| Max Acceleration of Tool Head | 20 m/s^2 |
| Max Hot End Flow | 32 mm^3/s |
| Part Cooling Fan | Closed-Loop Control |
| Hot End Fan | Closed-Loop Control |
| Control Board Fan | Closed-Loop Control |
| Chamber Temperature Regulator Fan | Closed-Loop Control |
| Auxiliary Part Cooling Fan | Closed-Loop Control |
| Air Filter | Activated Carbon Filter |
| PLA, PETG, TPU, ABS, ASA, PVA, PET | Yes |
| PA, PC | Ideal |
| Carbon/Glass Fiber Reinforced Polymer | Ideal |
| Bambu Micro Lidar | Yes |
| Chamber Monitoring Camera | 1920*1080 Included |
| Door Sensor | Yes |
| Filament Run Out Sensor | Yes |
| Filament Odometry | Optional |
| Power Loss Recover | Yes |
| Dimensions | 389*389*457mm |
| Net Weight | 14.13kg |
The first print
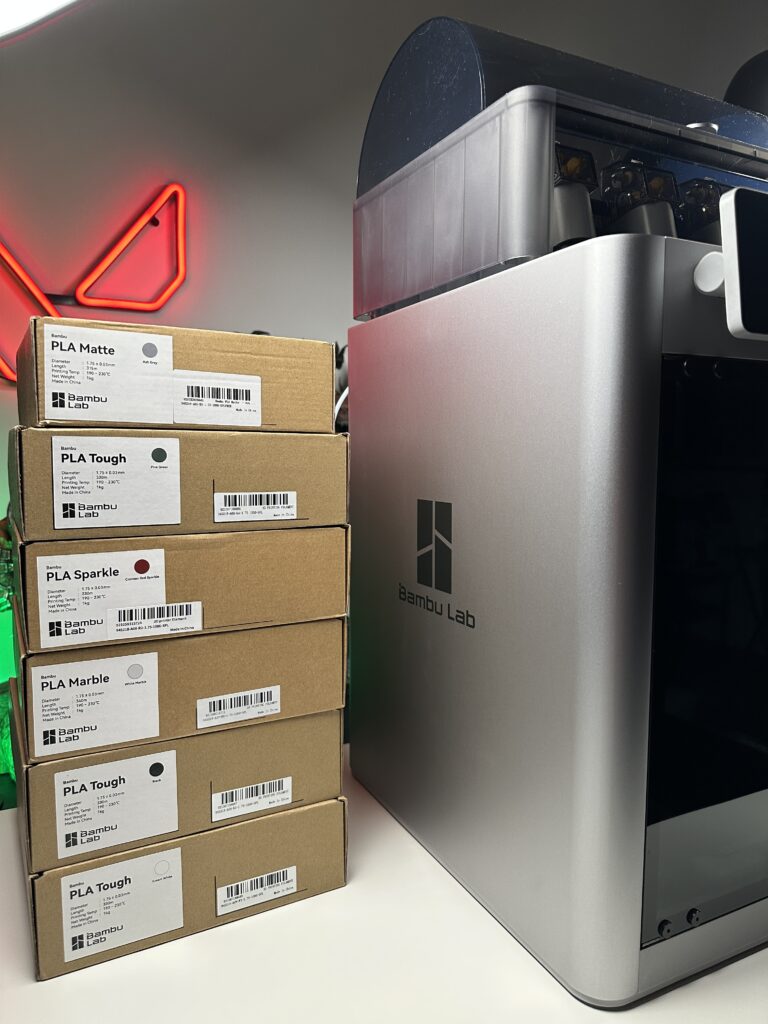
You are almost ready for your first print. The only thing you will need is some filament in the colours you prefer. Bambu Lab took care of that too and sent us 6kg of PLA in different colours to try out.
Each genuine Bambu filament comes with an RFID reader. The AMS reads this RFID and informs the printer about the type and colour of filament installed to automatically display it in the printer software. This does not block the use of other brand filaments. All you have to do is to adjust the colour and the type of filament manually. A big thumbs up to Bambu Lab who, while they could have locked their printer to only work with their own filaments, didn’t do that.
I have tried almost all of them and I can say that I am impressed with the results.
How to prepare your first print model
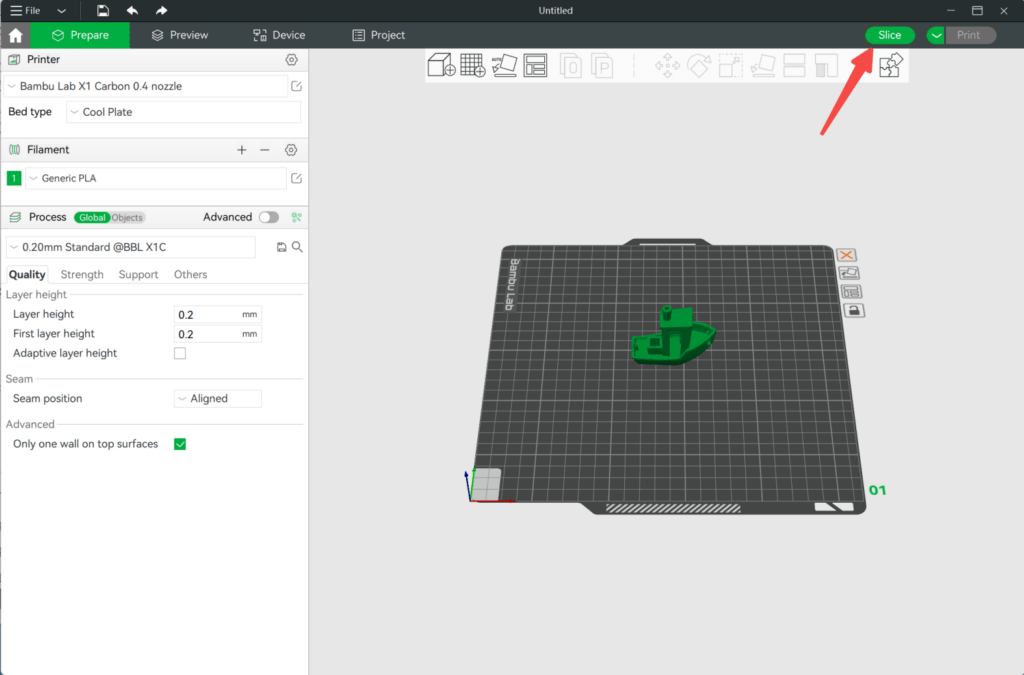
The filament is not the only thing you need in order to print something. Of course, you’ll also need a model. As I’ve mentioned in other reviews, a good site with lots of free models is Thingiverse. Once you’ve downloaded the model you want, there are two different ways to send it to the printer for printing. Either by saving it on the SD Card, or through your computer using the Bambu Studio application.
Bambu Studio and Bambu Handy app
Bambu Studio
When you open the Bambu Studio application it asks us for some basic information such as the area you live in, the model of the printer you have, the type of filaments you use and finally to log in to your Bambu Lab account.
After setting everything up, you move to the home page of the software. It may look familiar to some because it is based on three well-known slicers (Slic3r, Superslicer, Prusaslicer) with some modifications made by the Bambu Lab team to better suit their printers.
Bambu Studio’s interface is very clear and easy to use. On the top line, there are four different tabs.
- Prepare – This is where all the basic settings about the model are. You choose the printer, the filament, and a number of options regarding the quality, power and supports of the model.
- Preview – Here you find all the information about printing your model, based on the settings you have chosen. The result of slicing the model, the printing time and the supports. From here, you can also choose to start printing by sending it to the printer over the Wi-Fi network or saving the model in 0.3mf format for printing via an SD card.
- Device – It allows you to control the printer as well as the ability to see the print live through the printer’s integrated camera.
- Project – In the last tab you can save all the information about the specific project. You can add a picture for it, calculate how much it cost us and add its assembly steps, in case it consists of several pieces.
Bambu Handy
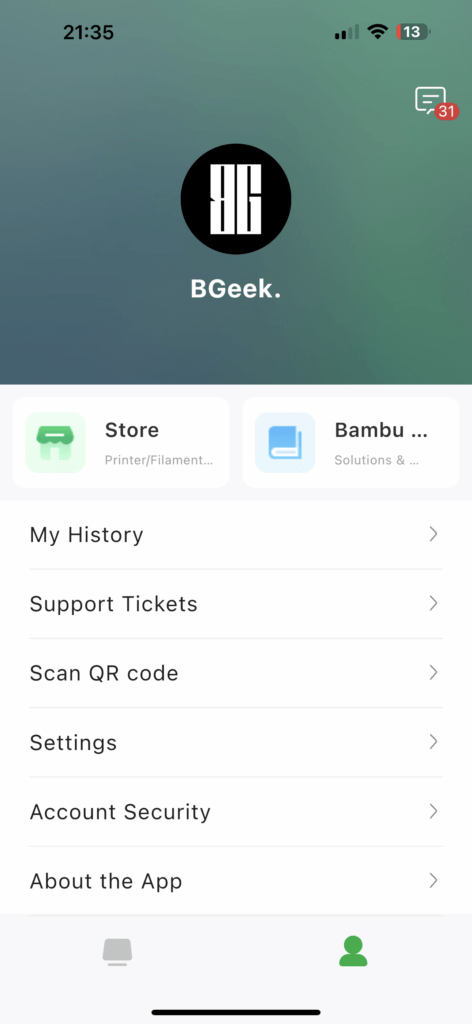
Bambu handy is Bambu Lab’s smartphone app. It is very easy to use and has many features. I will go through all the options it offers, step by step.
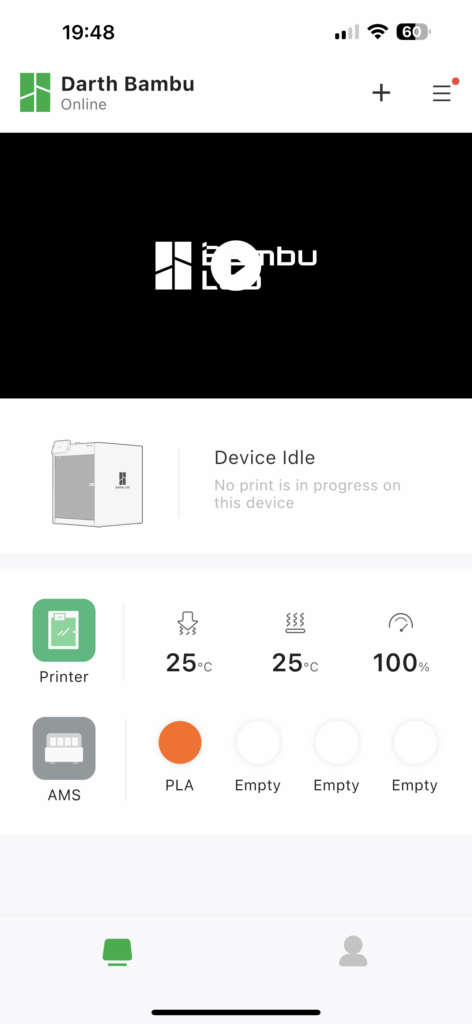
As soon as you open the application, you are taken to the main page. There, at the top, you have the name of the printer you are managing and just below a screen with a Play button. If you press this, you will have a live feed of the progress of your print. Right at the bottom you have the status bar. Printer condition, nozzle and bed temperature and print speed. The type and colours of filaments you have loaded into AMS are also mentioned there.
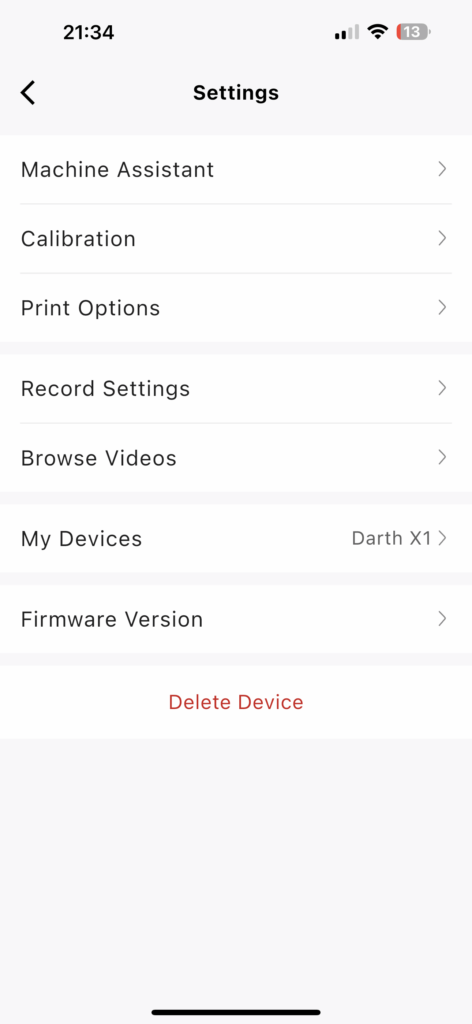
The three dashes in the upper right corner take us to the settings.
- Machine assistant displays all messages and notifications.
- In Calibration you can adjust the bed, the micro lidar and the vibrations of the printer.
- In Print Options, you can enable some properties such as AI print control, print bed position control, an inspection of the first print layer and automatic recovery in case of failure.
- In the Record Settings, you set whether you want it to record the entire print on video and whether it will be 720p or 1080p resolution.
- In Browse Videos, you will find the entire list of print videos that you have taken.
- And finally, in My Device, you can change the name of the printer and in Firmware you can see the version of your firmware and upgrade it directly from your mobile phone.
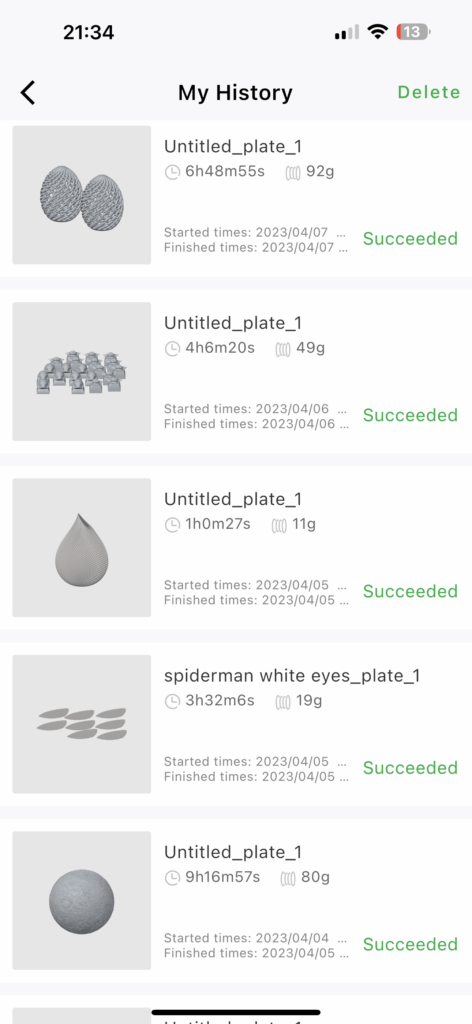
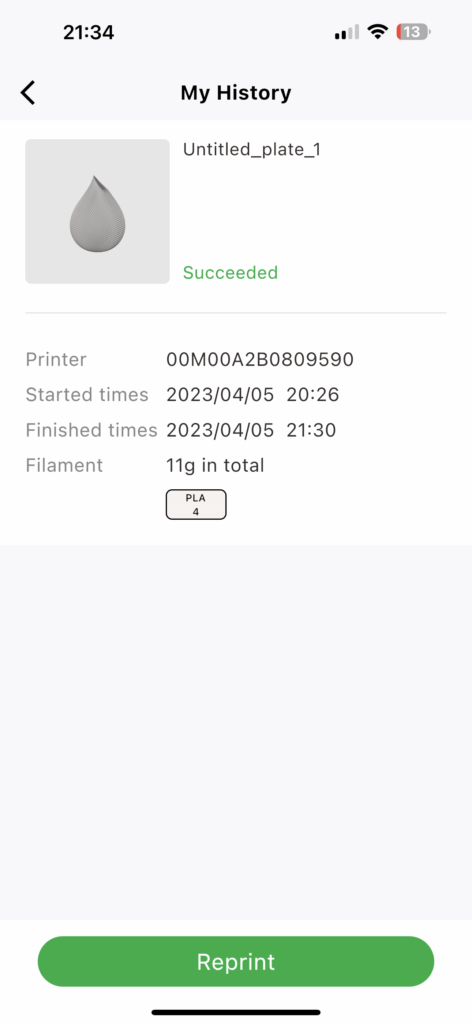
You may not be able to directly slice a model and send it for printing from the app, but by selecting your profile at the bottom right and then My History, it shows us all the prints you have made in the past. By selecting one of them and pressing Reprint, you can start printing the same model directly from your mobile.
My prints
Now let’s get to the fun part and maybe this is what really counts for a 3D printer. Ok, you know that the Bambu Lab X1 Carbon Combo is the fastest printer on the market. But what about quality? I won’t say anything on this and let some of my prints from the last month speak for themselves.
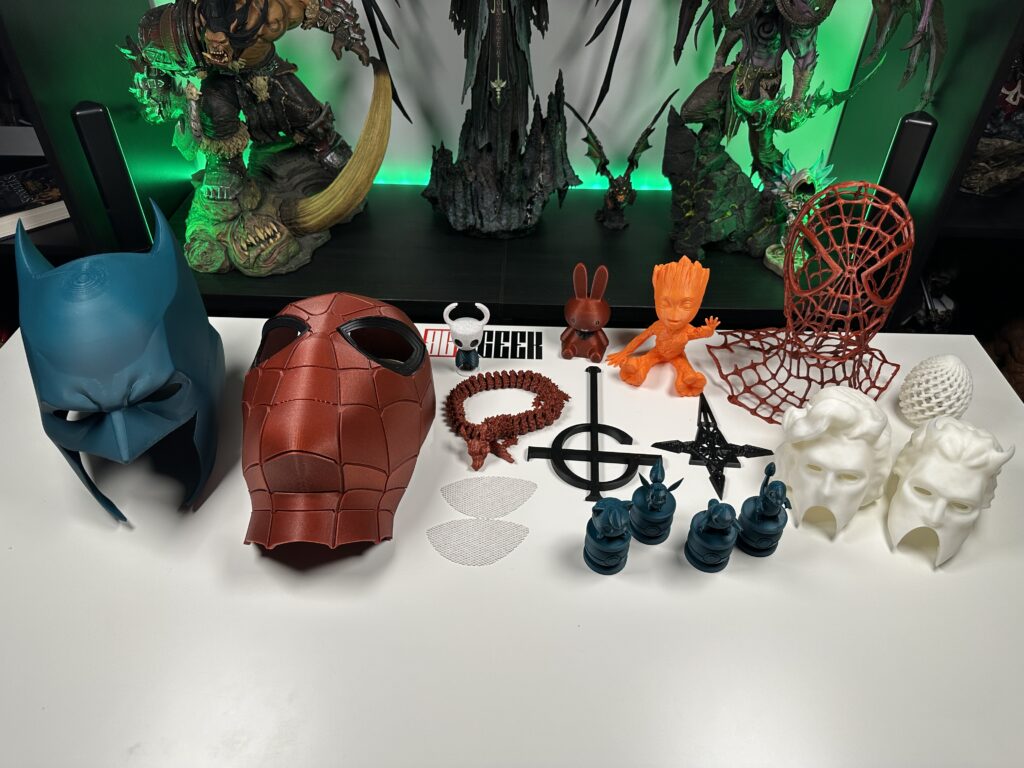
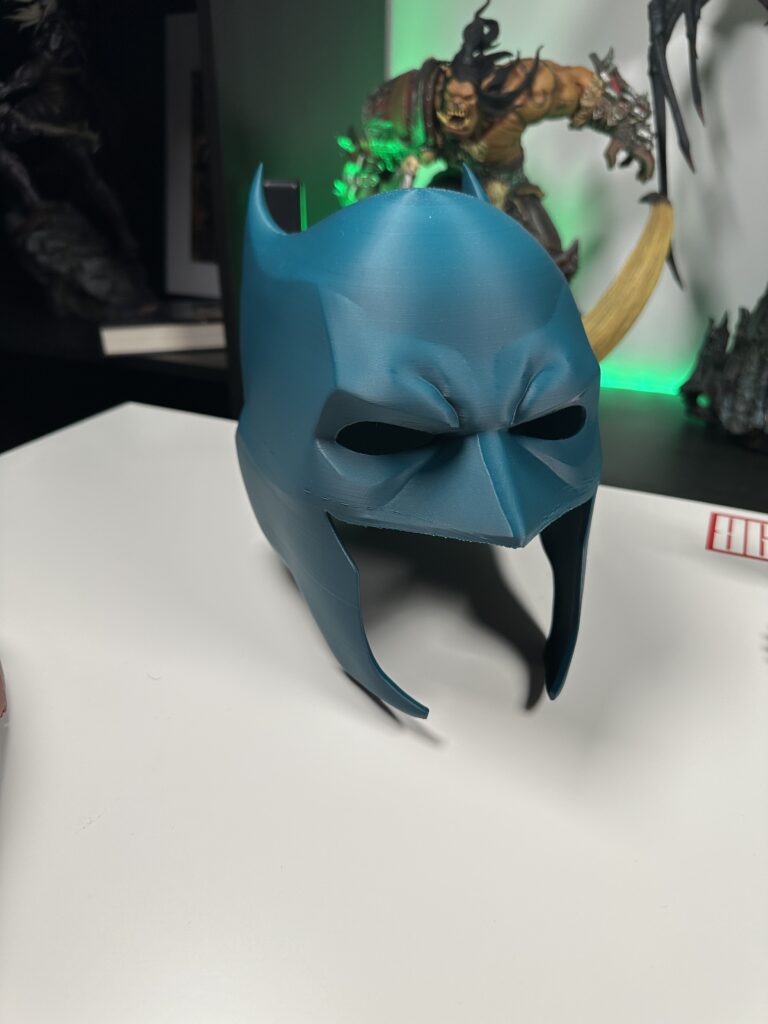
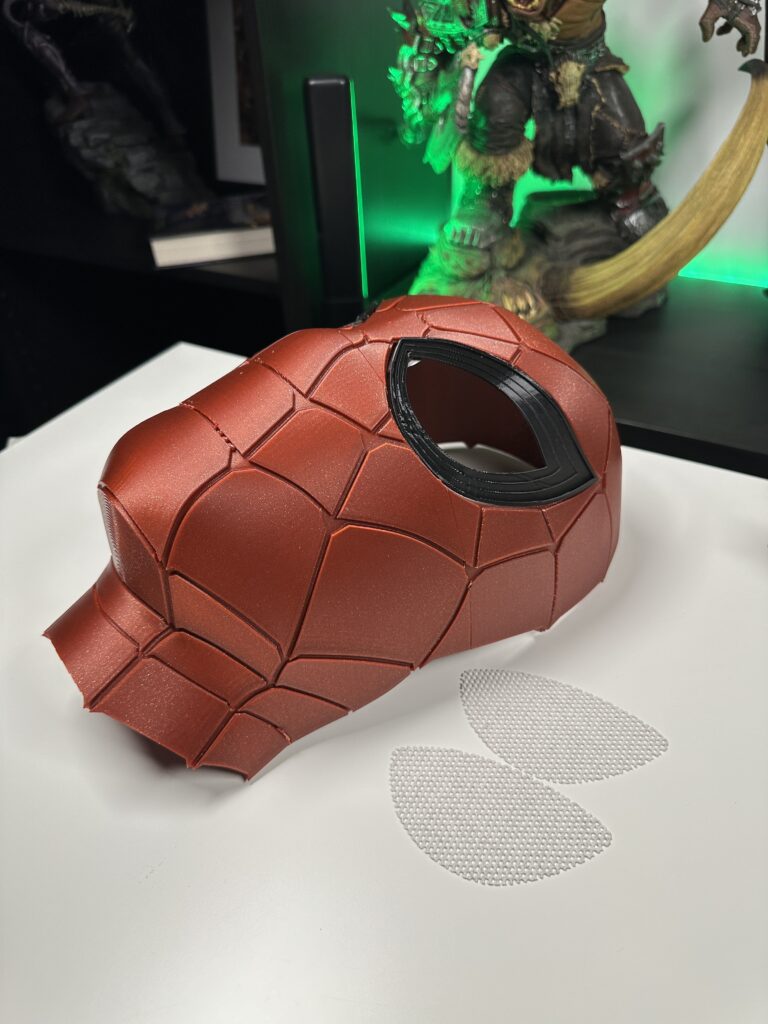
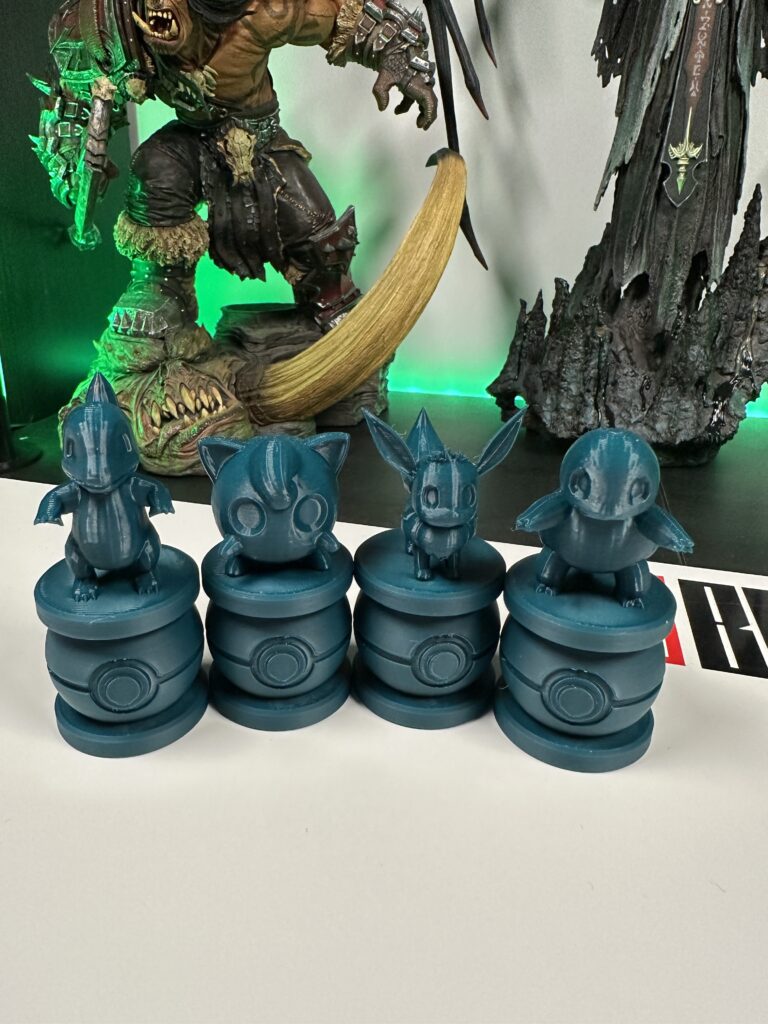
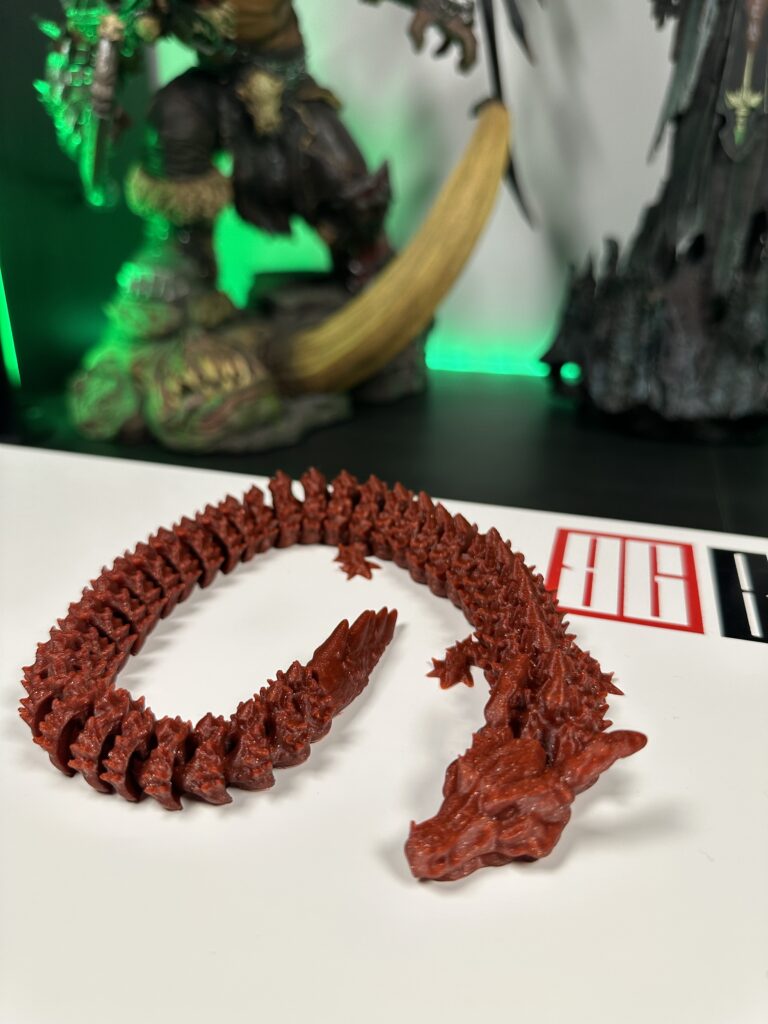
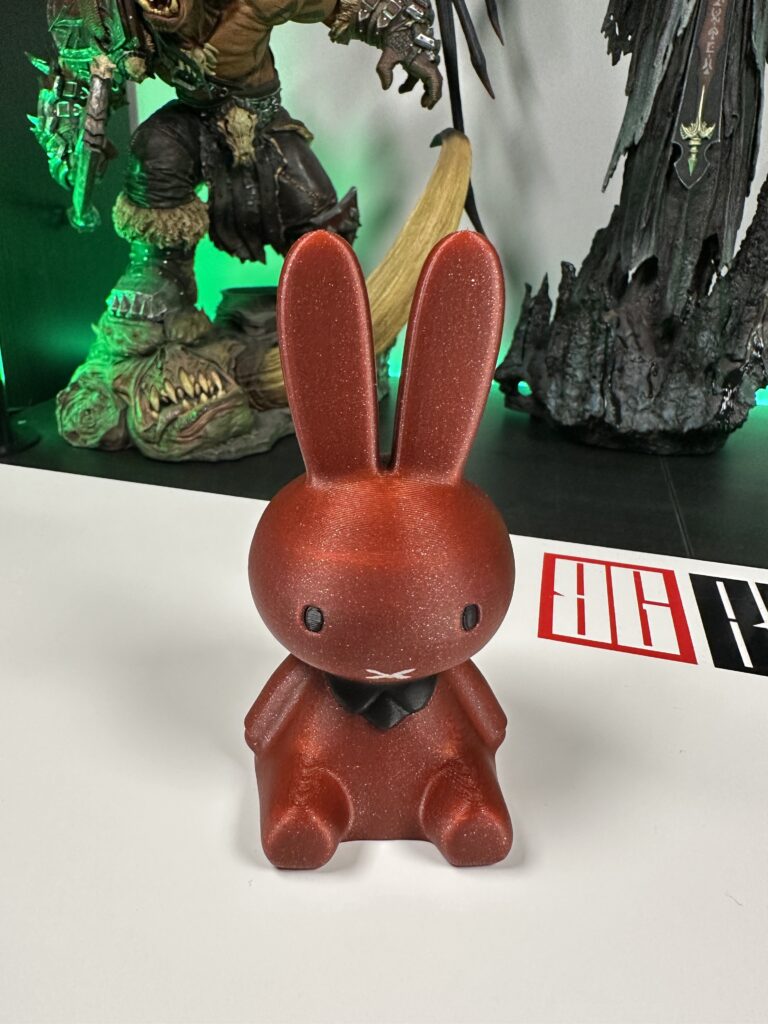
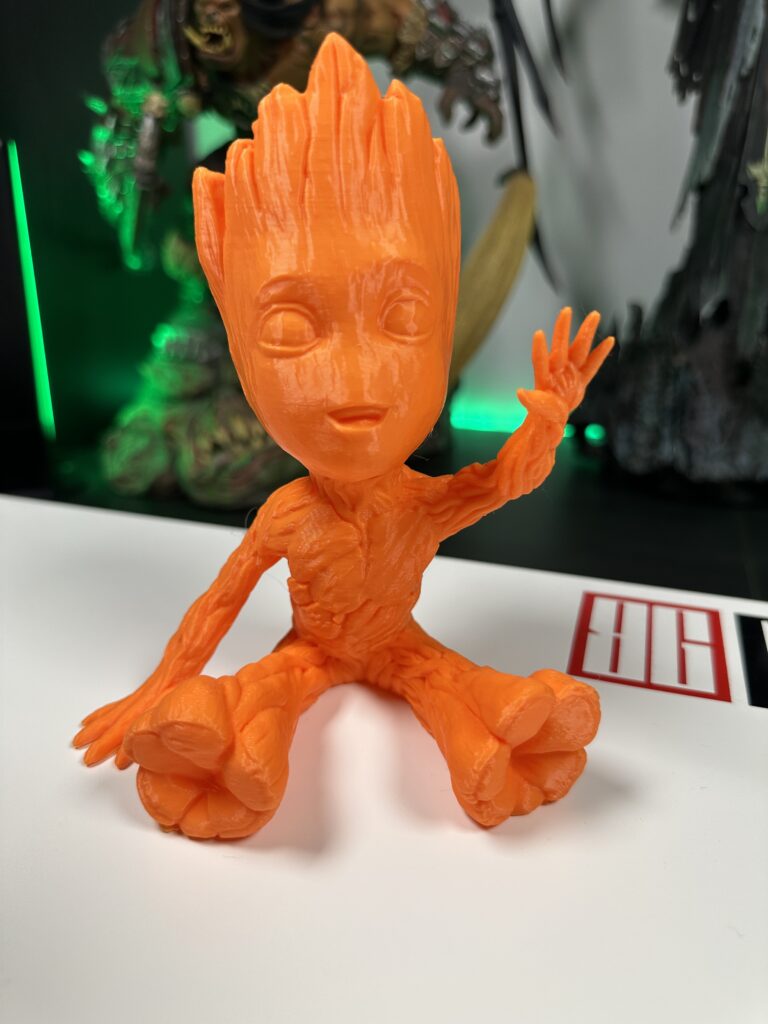

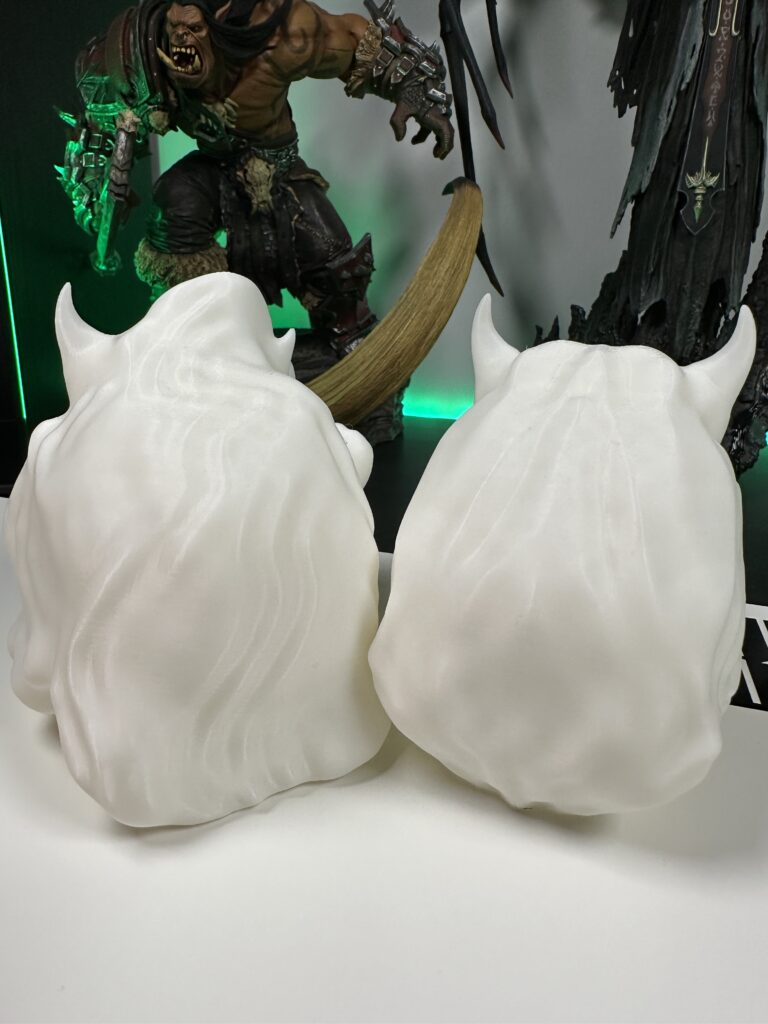
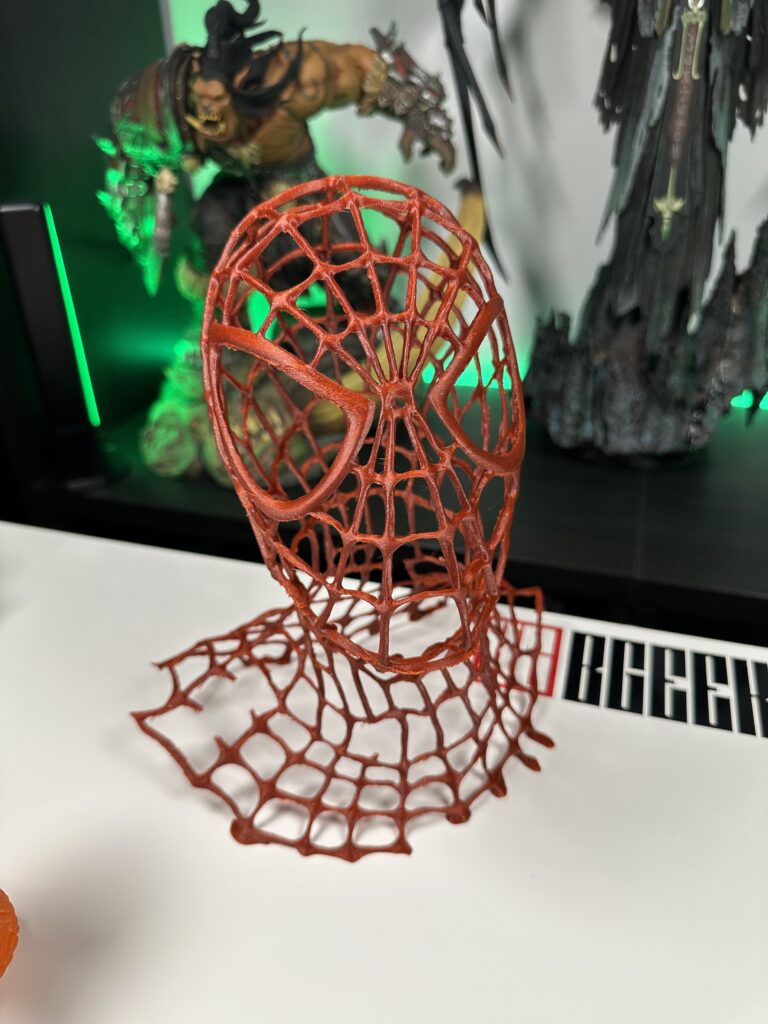
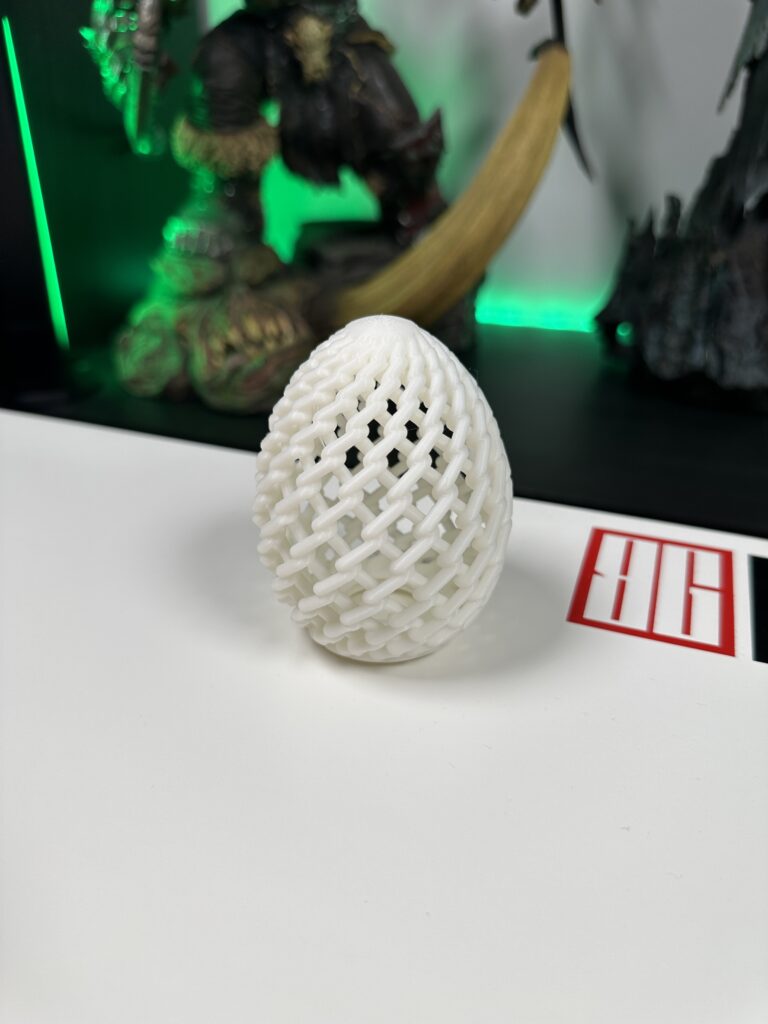

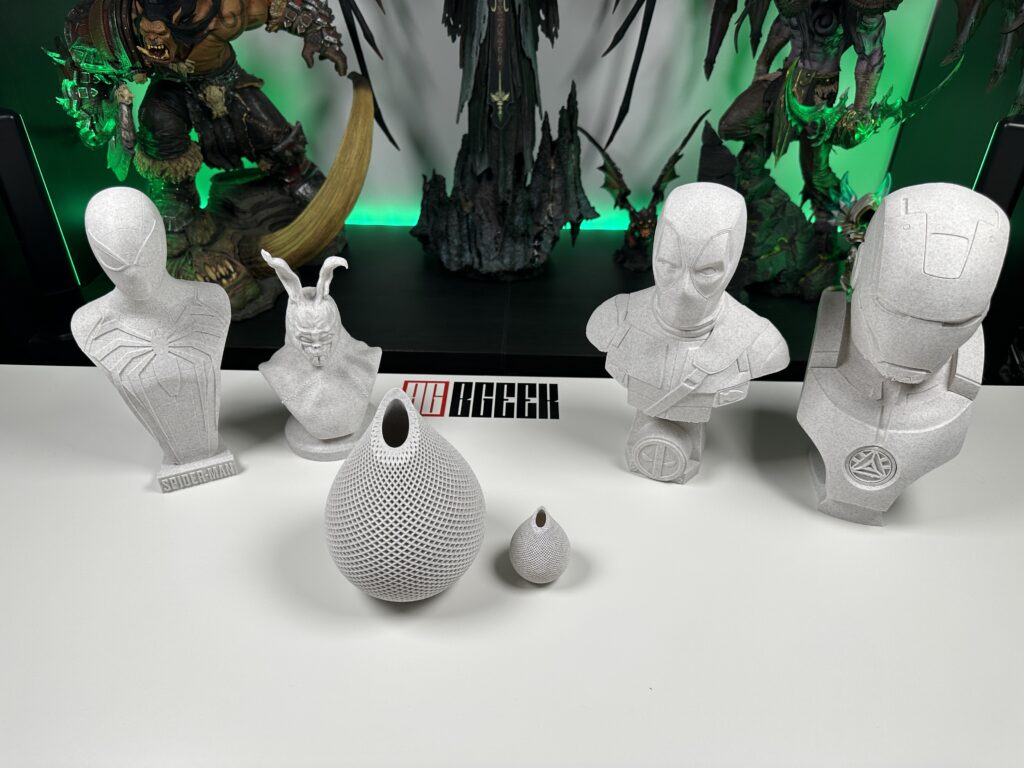
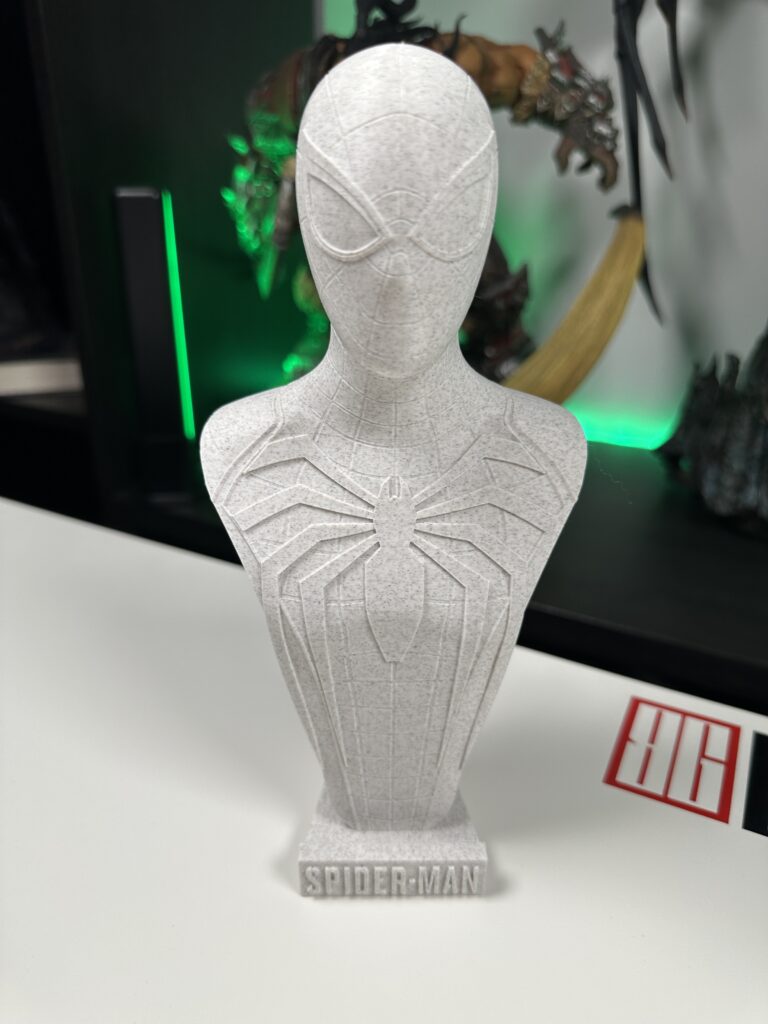
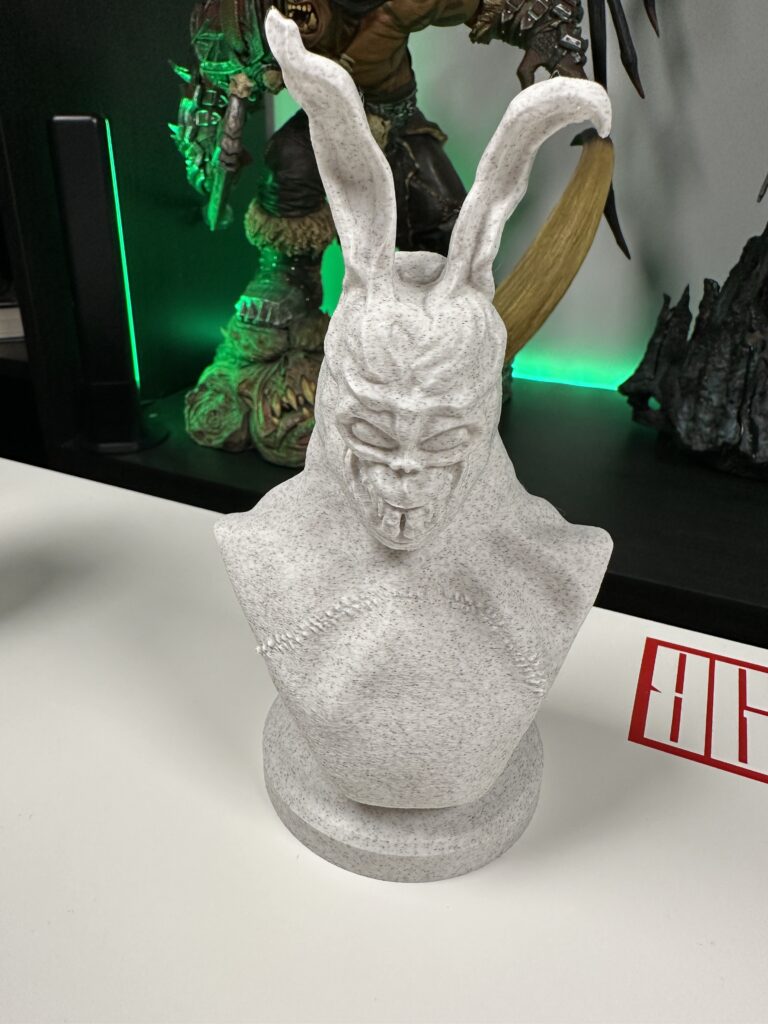

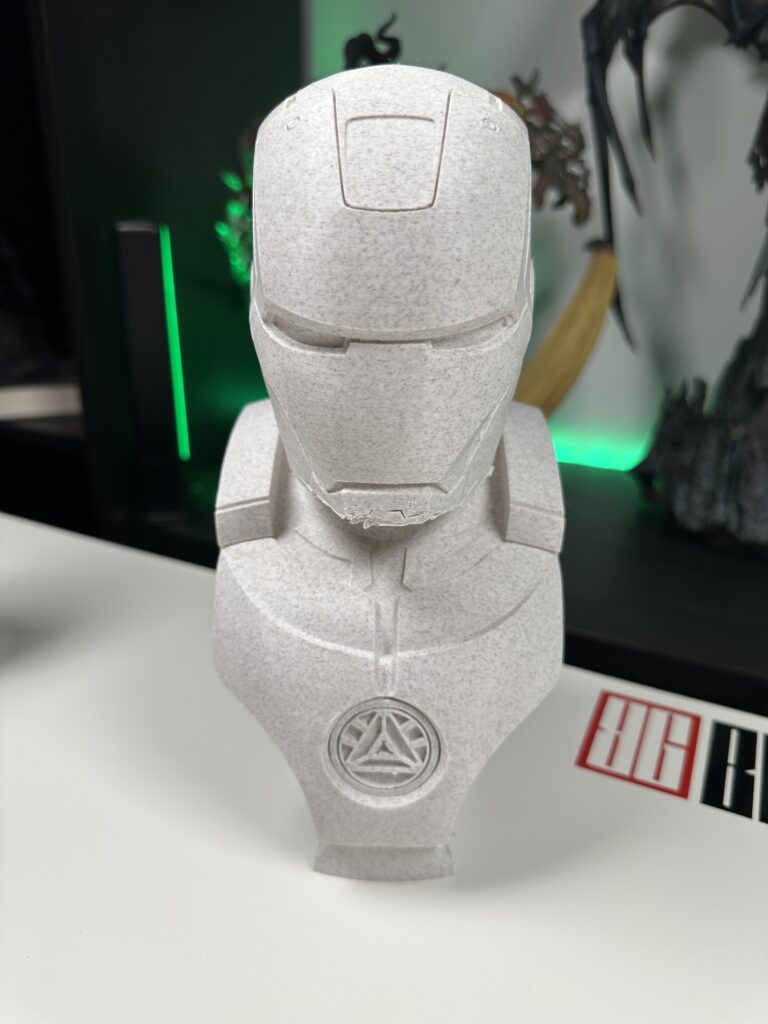
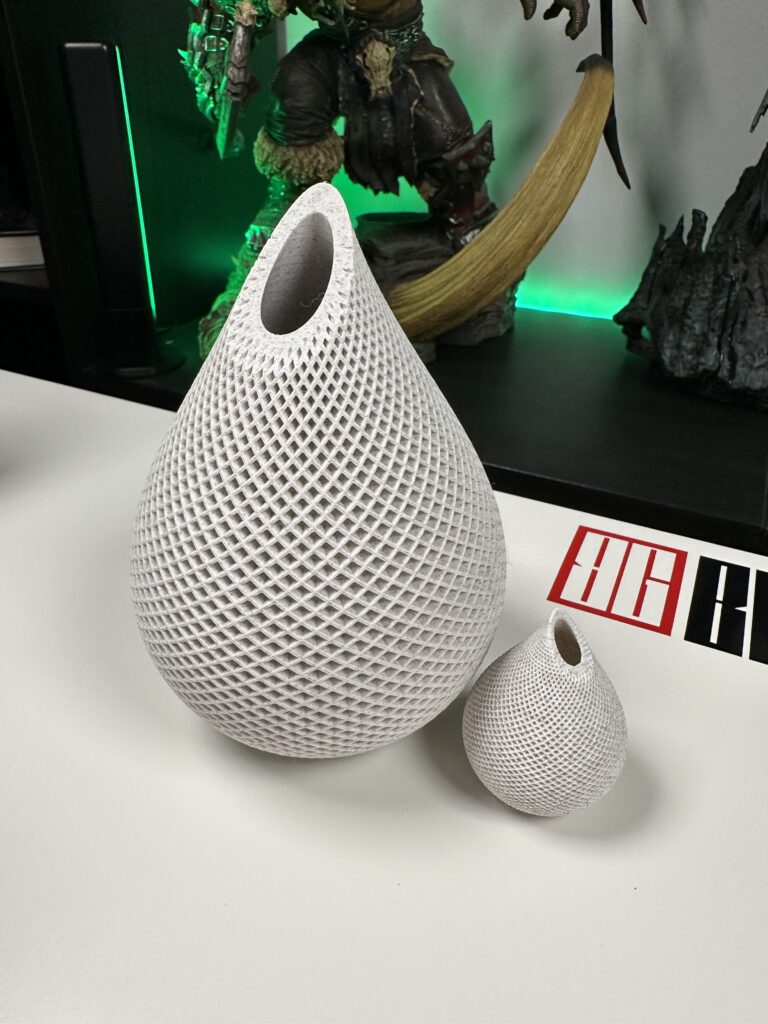
All models are exactly as they came off the printer. They have not been painted and I have not sanded them. Most of them are also with the default settings of Bambu Studio. Those models that have different colours like the Miffy bunny have been painted through Bambu Lab and printed with different colours with the support of AMS.
In case you want to enjoy some time-lapse videos of my prints, I have collected them on Google Drive for your eyes only.
Verdict
What should I write here? It’s not just the best printer I’ve ever owned. It’s one of the best pieces of tech I’ve ever seen. Furthermore, it’s as if they sat there at Bambu Lab, saw exactly what the 3D printing community has been asking for all these years, and generously offered it to us.
For me personally, the most important elements I search for in a 3D printer are the following: To be able to print quickly without hassle, to have the model printed in a short time, to have good print quality and to be able to detect random errors and stop printing. The Bambu Lab X1 Carbon Combo has it all and even more.
You can choose to do a full, automatic calibration before each print. You don’t have to do anything manually, and this results in even better, error-free prints. So less hassle and better quality, check.
Bambu Lab can print at 4 speeds Standard which is 100%, Silent which is 50%, Sport which is 124% and finally Ludicrous which is 166% of speed. To put the speed difference in perspective, a benchy prints on the average printer in about two hours, while on the X1CC, in Ludicrous mode, it takes just under 15 minutes.
With its integrated camera and AI technology, it can detect a possible spaghetti effect and stop printing by sending a notification to the smartphone. All you have to do is open the camera, see if the “damage” is acceptable and accordingly resume or cancel the print. This is a real lifesaver if you’re like me. That is if you print something during the night and go to sleep.
Of course, all of the above comes with a corresponding cost. The Bambu Lab X1 Carbon Combo comes at a price of €1,369 and you can get it from the official Bambu Lab store. But is it really expensive for all that it offers? That is for everyone to judge.
I have personally joined the Bambu Lab printer fan club and now we look at the rest of the 3D printer owners like this:

It’s currently my favourite printer and I hope it stays that way for a long time because, in addition to its capabilities, it also has a very beautiful design that fits perfectly in my mancave.
Well, that was it! In case you want to take a break between your prints, you can take a look at our interview with Duy Khanh Nguyen.
I would like to thank Bambu Lab and more specifically Nick for their trust and the review unit they gave me to write this article.